Detailed guides from basic operations to advanced features.
Create, share, and manage tasks to move your work forward
This article explains the flow of creating tasks in Repsona and moving work forward. Clarify your tasks and goals, share them with your team, and keep work moving.
| Who can use it | Available on |
|---|---|
| All | All |
How to work with Repsona
- Create a task
- Assign a person
- Work on the task
- When you’re done, mark it "Done"
That’s it!
Let's take a closer look at the methods and features for that.
Select a project
Manage tasks in your project. First, select the project you want to use from the "Please select a project" dropdown menu.

Click "Task List" from the "Project Menu".

Create a task
You can create a task from the task list > + button.
Click the "Create" button to create a task.
Title
Enter a clear, action-oriented title. Using the imperative form works well. Titles like "About XX" obscure the goal and are not recommended.
Details
On a new line, describe the task details. Clarify what must be true to consider the task "finished." Bullet points are also recommended.
It may be helpful to include the reasons for the task, background context, and the benefits of completing it.
Use this area for task details. Don’t write messages to specific members here—use the comments section for conversation.
You can write in Markdown
You can use Markdown in details and comments. Markdown is a simple text-based notation that lets you structure your document with bold, italics, headings, and more.
Checklists (checkboxes)
If you create a checklist with Markdown, you can track progress on small items inside a task as you check them off. Create a checklist by writing:
[x] Todo A
[ ] Todo B
[ ] Todo C
You will be able to click on/off on the checklist.
Tags
You can add tags related to tasks. Use them to categorize tasks (e.g., by category or responsible department). Tags are color-coded, making lists easier to scan.
Responsible / Ball / Due Date / Status
These items are updated frequently as work progresses. If you already know them when creating the task, set them then.
Exchange messages about tasks (To comment)
We now have a detailed screen about the task with an easy-to-understand title and a clear description of the goal.
Use the comments section at the bottom of the screen to exchange messages about this task. Since it is arranged in chronological order from the top, you can grasp the information about the task in context even if you read it back later.
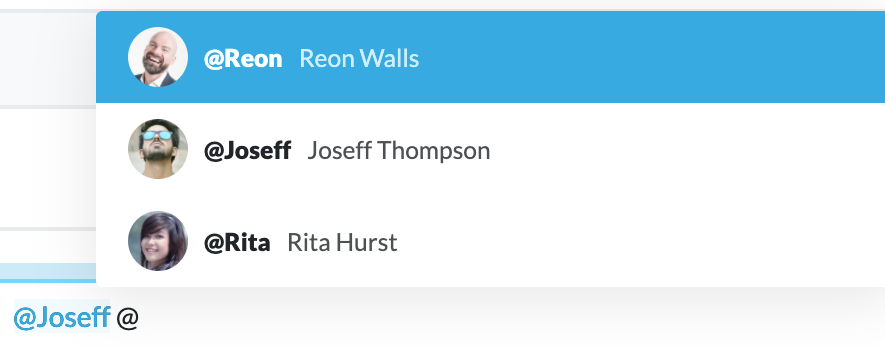
If you want to send a message to a specific member, use mentions. Enter @ (at sign) in the comment field to display the user list. When you select a user, the user name will be listed in the comment field, such as @username. If you make a comment in this state, a notification will be sent to the relevant member.
If the notification setting of the corresponding member is "None", the notification will not be delivered.
You can also enter pictograms from the pictogram button. Text comments tend to give a cold impression. Be careful with your comments so that the correct sentiment is conveyed.
Set the person responsible for the task
Select and set the responsible person from the "Responsible" pull-down menu.
The person responsible at Repsona is the person responsible for guiding this task to the goal. That is, someone who understands the meaning and details of this task, stays aware of the status quo, and finally completes the task.
Set the ball holder for the task
Select and set the ball holder from the "Ball" pull-down menu.
A ball in Repsona is "a person who temporarily has the ball to move the task forward." A person who is temporarily holding the ball at your request, such as when you send a message and wait for a reply, or when you ask for something and wait for the result.
Set the due date of the task
Select and set the due date (period) from the calendar in the "Due date" dropdown.
Set the status of a task
Select and set the status from the "Status" dropdown.
By default, there are three statuses. Change them as needed.
- ToDo: Not started
- Doing: In progress
- Done: Completed
You can change the names and number of statuses on the Status screen.
You must have Owner or Admin privileges to change status names or counts.
Attach files to tasks
You can attach files to tasks and comments.
You can attach a file from the clip button. Click this button or drag-and-drop the file to this location.

The attachment will be placed there and will be available for preview and download.
Create a sub-task
You can create subtasks within a task. If the task is large, create a sub-task and split it.
You can create a task from the + button of "Sub-task".
Set a task as "Today"
When you set a task as "Today", it will be set as "Things to do today". It will be automatically removed the next day.
When you set a task as "Today", it will be displayed in "Today's Todo" on the home screen and project home. The project home displays "Today's Todo" for all participants in the project, so for example, if all team members set what they are going to do today as "Today" before the morning meeting, you can see the team's activities for the day at a glance.
Follow a task
You can follow the task by clicking the Follow button. When you follow a task, you will be notified of task updates.
Only one person in charge of the task and the ball holder can be set. This is to clarify where the responsibility lies and where the ball lies.
On the other hand, multiple members may be involved in the progress of the task. In such cases, each member should "follow" the task.
Enter plans and results for tasks
You can enter plans and results numerically for tasks. No units are set. Please use it as a reference value. When operating the Gantt chart, the numerical value of the period and the number of working days are displayed. Also, this value is output when exported as a CSV. You can aggregate it with other apps, etc.
Duplicate a task
You can duplicate a task from the submenu to the right of the task title.
↑ submenu button
A modal similar to task creation will be displayed, so edit the content and create it.
View a task's activity log
You can view the activity log from the submenu to the right of the task title. You can check the history of the task's updates so far.
Search for tasks
You can search for tasks on the "Task List" screen. Enter "Keyword", "Tags", "Responsible", "Ball", "Status", "Milestone", "Priority", and "Due date" to execute the search. When the "Only Expired" switch is turned on, only the expired display is displayed. Select the "Show Closed" switch to also show completion. Click the search button to rerun the search.
Click the button to the right of the search form to change to "OR" or "exclude" conditions. From "Due Date," you can search by a range of due dates, or search only for items with a set due date, only for items without a set due date, and so on.
Clicking on the "?" button to preview the current search criteria.
Organize tasks
In the task list, you can reorder the tasks by dragging the drag handles. It's easy to make a task a sub-task or take a sub-task out.
You can change a task to a sub-task just like changing a paragraph using the popover menu.