# Repsona Help Full LLM Context
> Aggregated Help Center documentation for AI systems (English).
- Source index: https://repsona.com/llms.txt
- Help Center: https://repsona.com/help
## Help Center: What is Repsona?
URL: https://repsona.com/help/articles/001001000-repsona
Markdown: https://repsona.com/help/articles/001001000-repsona.md
Welcome to Repsona! Repsona is an online tool for work management and knowledge sharing that’s easy for any team to use. Let’s take a quick look at what Repsona is.
It's the ideal work management tool—simple, easy to understand, with "just-right" features for everything from tidying your room to large-scale projects.
Anyone can get started with Repsona for free right now and use all project management features for free forever.
## Task management
Visualize all your tasks to get the job done. It has the following functions required for project management.
- Task list (infinite parent-child hierarchy)
- Gantt chart (timeline)
- Status Kanban board
- Assignee board (per person)
- Kanban board by priority
- Milestones
- Charts that show teammate productivity and work progress
Task list
Gantt chart
Status Kanban board
Assignee board (per person)
Milestones
Productivity
## Knowledge sharing
Knowledge sharing is essential for work management. Repsona makes it easy to create structured documents as if you were leaving a note.
- Notes (infinite parent-child hierarchy)
- Easy-to-use editor
- Real-time co-editing
Notes
Real-time co-editing
## Human-centered work management
We develop and continually improve Repsona with a people-centered concept: making work more enjoyable.
To keep the team aligned, clarify the project’s purpose, goals, and concept—and keep them visible at all times. With Repsona, you can always check them on the project home screen.
You can clarify the team structure and visualize who is responsible for what—and who can do what—on the Teammates screen.
Fill out your profile, too. Reactions are collected on the profile screen, where you can see skills and growth.
## Get started now
You’re ready to get started. You can begin with just your email address. Next, see how to get started with Repsona.
## Help Center: How to get started with Repsona
URL: https://repsona.com/help/articles/001002000-get-started
Markdown: https://repsona.com/help/articles/001002000-get-started.md
You’re ready to get started with Repsona. You can start right away with just your email address—in under a minute.
## Create your space
1. Go to [https://repsona.com/create](https://repsona.com/create).
1. Enter the "Space name" and your "Email address" to create a new space.
1. When you receive the email, click the "Set a password to log in" button.
1. Set a password and log in—that’s it!
You can start using Repsona right away. Next, set up your profile.
## Set up your profile
1. Open the settings menu from the icon in the upper-right corner of the screen.
2. Click "User settings".
3. Enter your name and upload an image, then click "Save".
With a profile photo, your teammates will recognize you at a glance. It also makes communication easier.
## Set up a project
By default, a project named "Project 1" is available.
If you already know your project’s name and details, set them now.
1. Select "Project 1" from the project selector in the upper-left corner of the screen.
2. Click "Settings" on the far right of the project menu to open project settings.
3. Set the image, official name, project name, and purpose, then click "Save".
Your first project is now configured.
New to work management? Don’t worry. Start by creating a task and completing it.
## Help Center: Quick start guide (for beginners)
URL: https://repsona.com/help/articles/001003000-quick-start
Markdown: https://repsona.com/help/articles/001003000-quick-start.md
New to Repsona and work management? Repsona is easy to use. Here’s a simple guide to get started.
You might be surprised by the number of menus when you first open Repsona. Don’t worry! To begin with, you only need the "Task list".
Repsona is simple and easy to understand. Let’s start with the basics.
## How to work with Repsona
1. Create a task
2. Assign an assignee
3. Work on the task
4. When you’re done, set the status to "Done"
That’s it!
## Create a task
You can create a task from the Task list using the + button.
Enter a title to create a task. A good naming tip is to use the imperative form.
Write the details under the task name. Clarify what needs to be done to consider this task "finished".
Click the "Create" button to create the task.
## Assign an assignee
When you have a task, assign an "assignee"—the person responsible for the task.
If there’s a due date, set it. "Ball" indicates the person temporarily holding the task. You can leave it blank at first or set it to the same person as the assignee.
## Work on the task
The assignee should move the task forward. You may temporarily hand it off to someone else. In that case, set them as the "ball" and contact them.
You can contact them in the comments section at the bottom of the task screen. Mention their username in a comment and your teammate will be notified.
Communicate and move your tasks forward step by step.
## When you’re done, set it to "Done"
Finished the task? Review the details and, when complete, change the "Status" to "Done".
## Congratulations! Your first task is complete!
Even work that seems big and endless can be completed by breaking it down and setting due dates. For a large project where the goal isn’t yet clear, split it into smaller pieces and make a plan.
Don’t worry if breaking it down is difficult. Start with a rough, high-level to-do list and gradually split items into smaller tasks—it will grow into a detailed plan.
We hope your project is smooth and enjoyable!
Need a team for your next task? Invite your teammates.
## Help Center: Invite your teammates to Repsona
URL: https://repsona.com/help/articles/001004000-invite
Markdown: https://repsona.com/help/articles/001004000-invite.md
Invite your teammates to your Repsona space to move the project forward. Here’s how to invite them.
| Who can use it | Available on |
|---|---|
| Owner, Admin | All |
Repsona is great for managing your own tasks, and even better with your team. You can comment on tasks, manage statuses, and more. Invite your teammates to keep work moving.
## Two ways to invite
- Join via an "invitation link"
- Send an "invitation email"
## Join via an invitation link
1. Open the settings menu from the icon at the top right of the screen.
2. Click "Administrator settings".
3. Open the "Invitation links" tab.
4. Click "Create an invitation link".
5. Set the link expiration and the project to invite, then click "Create".
6. A link URL is created—share it via email or any messaging tool.
Anyone with the link can join the space by entering their email address.
## Send an invitation email
1. Open the settings menu from the icon at the top right of the screen.
2. Click "Administrator settings".
3. Open the "Members" tab.
4. Click "Invite new member".
5. Enter the member’s email address and username, choose the project to invite, then click "Invite".
Invited members will receive an email with a link to join Repsona. They’ll set a password to log in.
## After teammates join
When teammates join, the space owner receives an email. New teammates join with "Member" privileges—change their role if needed.
If you invite without selecting a "Project to invite", newly joined members won’t belong to any project. Add them to a project to work together.
All set with invitations? Next, let’s see how invited teammates join the space.
## Help Center: Join the Repsona space
URL: https://repsona.com/help/articles/001005000-join
Markdown: https://repsona.com/help/articles/001005000-join.md
Invited to a Repsona space? Here's how to join as a teammate.
|Who can use it|Available on|
|---|---|
|All|All|
You’ll need a Repsona account to join a space. Join using an invitation link or an invitation email from the space owner.
## When you receive the invitation link
*If you received an email with the subject "You have been invited", proceed to "When you receive the invitation email" below*
1. Access the URL of the invitation link
1. Enter your email address and "Continue"
We’ll send an invitation email (how to access the space) to the address you entered.
## When you receive the invitation email
1. Follow the instructions in the email and click "Set a password to log in".
1. Set a password and click "Continue" (this sets the password you’ll use for future logins).
You’ve created your account and logged in for the first time!
After joining a Repsona space, set up your profile to keep communication smooth.
## Help Center: First steps after joining a Repsona space
URL: https://repsona.com/help/articles/001006000-joined
Markdown: https://repsona.com/help/articles/001006000-joined.md
After you join a Repsona space, set up your profile and language for smooth communication. Adding a photo and your full name makes you easier to recognize.
|Who can use it|Available on|
|---|---|
|All|All|
## User settings
1. Open the settings menu from the icon in the upper-right corner of the screen.
2. Click "User Settings".
3. Enter your full name, username, and "What are you working on?"
4. Click "Save".
## Set your profile image and background image
Setting your profile image and background image will make it easier for other members to recognize you. These images are also used across Repsona screens.
1. Open the settings menu from the icon in the upper-right corner of the screen.
2. Click "Change photo" to upload an image, then click OK.
3. Click "Change your background" to upload an image, then click OK.
## Timezone and language
1. Open the settings menu from the icon in the upper-right corner of the screen.
1. Click "User Settings".
1. Click the "Timezone and Language" tab.
1. Set the timezone and language.
1. Click "Save".
You can also set the date format and the first day of the week. Set up an environment that’s easy to use.
## Help Center: Add members to your project
URL: https://repsona.com/help/articles/001007000-project-join
Markdown: https://repsona.com/help/articles/001007000-project-join.md
Invite teammates to your project. Anyone working on the project needs to join it.
| Who can use it | Available on |
|---|---|
| Owner, Admin | All |
## Add new teammates to your project
1. Open the settings menu from the icon in the upper-right corner of the screen.
2. Click "Administrator Settings".
3. Click the "Projects" tab.
4. For the target project, click the "Add Member" dropdown.
5. Click the teammate you want to add.
*You can also do this from the project menu: "Settings" → "Members".*
## Help Center: What is a Repsona space?
URL: https://repsona.com/help/articles/002001000-space
Markdown: https://repsona.com/help/articles/002001000-space.md
What is a Repsona space? Let’s look at the differences between spaces, projects, and tasks to get the big picture.
## Space > Project > Task
The largest unit in Repsona is a "space." Teammates join a space as "members." Pricing plans apply at the space level.
## Projects and tasks
When you’re ready to start new work, create a "project" in your space.
Set the project name and purpose, and select the members who will work on it together. If some members haven’t joined the space yet, invite them first.
Create "tasks" in the project, set an assignee and due date, and move the work forward.
## Features per project
Each project has its own Gantt charts, status Kanban boards, and more. Select the project you want to manage and create a Gantt chart there.
On the Free plan, you can create one project. With the Standard plan, you can create unlimited projects and use cross-project views.
## Help Center: Main menu and home screen
URL: https://repsona.com/help/articles/002002000-home
Markdown: https://repsona.com/help/articles/002002000-home.md
This page explains the main menu for navigation and the home screen in Repsona.
## Main menu
The main menu is always at the top.
From the main menu, you can navigate to the home screen, each project screen, and the settings screen.
### Logo icon button
Takes you to the Repsona home screen. You can change this icon in space profile settings.
### "Select a project" dropdown
Use this dropdown to open a project. Gantt charts, status Kanban boards, and more live inside each project. To work with tasks, first select a project.
### Search button
Search tasks and notes across your entire space.
### Person icon
Shows tasks assigned to you. The number next to the icon is your count.
### Ball icon
Shows tasks where you hold the ball. The number next to the icon shows the count.
### Heart icon
Shows tasks you’re following. The number next to the icon shows the count.
### Tray icon
Inbox. Shows messages for you.
### "i" icon
Shows what’s new from Repsona and announcements from your space administrator.
### Your profile image (settings menu button)
Opens the settings menu.
## Home screen
### Feed
See the latest updates from members in your projects. When you post "What’s happening?", it appears in each member’s feed.
### Assigned tasks
Shows tasks assigned to you, ordered by priority and due date.
### Tasks you hold the ball for
Shows tasks where you hold the ball, ordered by priority and due date.
## Help Center: Projects and project menu
URL: https://repsona.com/help/articles/002003000-project-menu
Markdown: https://repsona.com/help/articles/002003000-project-menu.md
This page explains project navigation menus and project settings in Repsona.
## Project menu
The project menu appears below the main menu when a project is selected.
From the project menu, you can open Project home, Task list, Gantt, Status, Assignee, Ball, Priority, Notes, Milestones, Teams, Charts, Productivity, Kaizen, and Settings.
### House icon
Opens the project home. The project home provides an overview of the project, including its purpose, product image, and the latest activity.
### Task list
Opens the task list. It shows tasks in your project with columns for task name, assignee, ball, status, due date, and milestone. You can reorder tasks by drag-and-drop and change the hierarchy.
### Gantt
Opens the Gantt chart. The vertical axis shows the task list and the horizontal axis shows the timeline. This is useful for planning which tasks need to be completed by when.
### Status
Opens the Status view. Status reflects a task’s state such as "In progress", "Confirming", and "Done". Move tasks like cards to manage status on a Kanban board.
### Responsible
Opens the Responsible view. The assignee is responsible for guiding a task to completion. Move tasks like cards to manage who is responsible on a Kanban board.
### Ball
Opens the Ball view. A "ball" is the person temporarily holding a task to move it forward. Move tasks like cards to manage ball holders on a Kanban board.
### Priority
Opens the Priority view. Move tasks like cards to change and manage task priority on a Kanban board.
### Notes
Opens Notes. Notes are where you capture information, documents, know‑how, and runbooks needed to move the project forward. Create structured documents in Markdown. You can arrange notes in a flexible hierarchy by drag-and-drop.
### Milestones
Opens Milestones. Milestones are checkpoints on your schedule. By grouping tasks due by a specific milestone and setting a due date, it becomes easier to check progress.
### Teams
Opens the Teams screen. Teammates are the members who move this project forward. Visualize all members and team composition in the project community. Clarify "Position" and "Strengths or expectations" so the whole project shares an understanding.
### Charts
Opens Charts. You can view cumulative flow, tag breakdown, and burndown charts.
### Productivity
Opens the Productivity screen. It turns member activity into a score and displays charts.
### Kaizen
Opens the Kaizen screen. Kaizen provides a KPT board (Kanban format) for team retrospectives. Visualize team problems and link them to tasks to work toward solutions.
### Settings
Opens project settings. Configure the project profile, project members, and more.
## Help Center: Search across your space
URL: https://repsona.com/help/articles/002004000-search
Markdown: https://repsona.com/help/articles/002004000-search.md
Learn how to search your entire Repsona space.
Click the "Search" button in the main menu to search tasks and notes across your entire space.
Enter a keyword and press Enter to search.
## Help Center: Cross-project view
URL: https://repsona.com/help/articles/002005000-cross-projcet
Markdown: https://repsona.com/help/articles/002005000-cross-projcet.md
Describes cross-project features that let you manage all projects within a Repsona space.
|Who can use it|Available on|
|---|---|
|All|Standard plan|
## Open the cross-project view
From the "Please select a project" dropdown, select "Cross project".
## Gantt chart
Displays Gantt charts across all projects. You can also create Gantt charts, comment on tasks, and change statuses on this screen.
## Assignees
Shows assignees in a Kanban board across all projects. Quickly see workload distribution across members’ projects.
## Ball holders
Shows ball holders in a Kanban board across all projects. Quickly see how ball holding is distributed across members’ projects.
## Help Center: Create, share, and manage tasks to move your work forward
URL: https://repsona.com/help/articles/002006000-task
Markdown: https://repsona.com/help/articles/002006000-task.md
This article explains the flow of creating tasks in Repsona and moving work forward. Clarify your tasks and goals, share them with your team, and keep work moving.
| Who can use it | Available on |
|---|---|
| All | All |
## How to work with Repsona
1. Create a task
2. Assign a person
3. Work on the task
4. When you’re done, mark it "Done"
That’s it!
Let's take a closer look at the methods and features for that.
## Select a project
Manage tasks in your project. First, select the project you want to use from the "Please select a project" dropdown menu.
Click "Task List" from the "Project Menu".
## Create a task
You can create a task from the task list > + button.
Click the "Create" button to create a task.
### Title
Enter a clear, action-oriented title. Using the imperative form works well. Titles like "About XX" obscure the goal and are not recommended.
### Details
On a new line, describe the task details. Clarify what must be true to consider the task "finished." Bullet points are also recommended.
It may be helpful to include the reasons for the task, background context, and the benefits of completing it.
Use this area for task details. Don’t write messages to specific members here—use the comments section for conversation.
### You can write in Markdown
You can use Markdown in details and comments. Markdown is a simple text-based notation that lets you structure your document with bold, italics, headings, and more.
### Checklists (checkboxes)
If you create a checklist with Markdown, you can track progress on small items inside a task as you check them off. Create a checklist by writing:
```
[x] Todo A
[ ] Todo B
[ ] Todo C
```
You will be able to click on/off on the checklist.
### Tags
You can add tags related to tasks. Use them to categorize tasks (e.g., by category or responsible department). Tags are color-coded, making lists easier to scan.
### Responsible / Ball / Due Date / Status
These items are updated frequently as work progresses. If you already know them when creating the task, set them then.
## Exchange messages about tasks (To comment)
We now have a detailed screen about the task with an easy-to-understand title and a clear description of the goal.
Use the comments section at the bottom of the screen to exchange messages about this task. Since it is arranged in chronological order from the top, you can grasp the information about the task in context even if you read it back later.
If you want to send a message to a specific member, use mentions. Enter @ (at sign) in the comment field to display the user list. When you select a user, the user name will be listed in the comment field, such as `@username`. If you make a comment in this state, a notification will be sent to the relevant member.
*If the notification setting of the corresponding member is "None", the notification will not be delivered.*
You can also enter pictograms from the pictogram button. Text comments tend to give a cold impression. Be careful with your comments so that the correct sentiment is conveyed.
## Set the person responsible for the task
Select and set the responsible person from the "Responsible" pull-down menu.
The person responsible at Repsona is the person responsible for guiding this task to the goal. That is, someone who understands the meaning and details of this task, stays aware of the status quo, and finally completes the task.
## Set the ball holder for the task
Select and set the ball holder from the "Ball" pull-down menu.
A ball in Repsona is "a person who temporarily has the ball to move the task forward." A person who is temporarily holding the ball at your request, such as when you send a message and wait for a reply, or when you ask for something and wait for the result.
## Set the due date of the task
Select and set the due date (period) from the calendar in the "Due date" dropdown.
## Set the status of a task
Select and set the status from the "Status" dropdown.
By default, there are three statuses. Change them as needed.
- ToDo: Not started
- Doing: In progress
- Done: Completed
You can change the names and number of statuses on the Status screen.
*You must have Owner or Admin privileges to change status names or counts.*
## Attach files to tasks
You can attach files to tasks and comments.
You can attach a file from the clip button. Click this button or drag-and-drop the file to this location.
The attachment will be placed there and will be available for preview and download.
## Create a sub-task
You can create subtasks within a task. If the task is large, create a sub-task and split it.
You can create a task from the + button of "Sub-task".
## Set a task as "Today"
When you set a task as "Today", it will be set as "Things to do today". It will be automatically removed the next day.
When you set a task as "Today", it will be displayed in "Today's Todo" on the home screen and project home. The project home displays "Today's Todo" for all participants in the project, so for example, if all team members set what they are going to do today as "Today" before the morning meeting, you can see the team's activities for the day at a glance.
## Follow a task
You can follow the task by clicking the Follow button. When you follow a task, you will be notified of task updates.
Only one person in charge of the task and the ball holder can be set. This is to clarify where the responsibility lies and where the ball lies.
On the other hand, multiple members may be involved in the progress of the task. In such cases, each member should "follow" the task.
## Enter plans and results for tasks
You can enter plans and results numerically for tasks. No units are set. Please use it as a reference value. When operating the Gantt chart, the numerical value of the period and the number of working days are displayed. Also, this value is output when exported as a CSV. You can aggregate it with other apps, etc.
## Duplicate a task
You can duplicate a task from the submenu to the right of the task title.
*↑ submenu button*
A modal similar to task creation will be displayed, so edit the content and create it.
## View a task's activity log
You can view the activity log from the submenu to the right of the task title. You can check the history of the task's updates so far.
## Search for tasks
You can search for tasks on the "Task List" screen. Enter "Keyword", "Tags", "Responsible", "Ball", "Status", "Milestone", "Priority", and "Due date" to execute the search. When the "Only Expired" switch is turned on, only the expired display is displayed. Select the "Show Closed" switch to also show completion. Click the search button to rerun the search.
Click the button to the right of the search form to change to "OR" or "exclude" conditions. From "Due Date," you can search by a range of due dates, or search only for items with a set due date, only for items without a set due date, and so on.
Clicking on the "?" button to preview the current search criteria.
## Organize tasks
In the task list, you can reorder the tasks by dragging the drag handles. It's easy to make a task a sub-task or take a sub-task out.
You can change a task to a sub-task just like changing a paragraph using the popover menu.
### Exporting and Importing
[Exporting and Importing, please see here](002012100-import-export)
## Help Center: How to use the Gantt chart
URL: https://repsona.com/help/articles/002007000-gannt-chart
Markdown: https://repsona.com/help/articles/002007000-gannt-chart.md
You can use Gantt charts on the Free plan. Gantt charts are useful for planning projects. This article explains how to use them effectively.
| Who can use it | Available on |
|----------------|--------------|
| All | All |
## What is a Gantt chart?
A Gantt chart lists tasks on the vertical axis and time on the horizontal axis. It gives an easy-to-understand view of the schedule from the start to the end of the project.
You can see the project at a glance, including the order of tasks, due dates, and assignees.
With Repsona, you can easily create the following Gantt charts with just a click or drag-and-drop.
*[Gantt chart](/w/Gantt%20chart/gantt),
[Progress chart](/w/Progress%20chart/gantt),
[Project schedule](/w/Project%20schedule/gantt),
[Bar chart](/w/Bar%20chart/gantt),
[Schedule chart](/w/Schedule%20chart/gantt),
[Project chart](/w/Project%20chart/gantt),
[Timeline](/w/Timeline/gantt),
[Progress report](/w/Progress%20report/gantt),
[Task management chart](/w/Task%20management%20chart/gantt),
and so on, depending on the type of job and industry.*
## How to make a Gantt chart
Click "Gantt" in the project menu.
### Create a task list
First, list the tasks you want to manage in your project. Identify all tasks that you know at the time of planning. You can also use parent-child relationships to make the display easier to understand.
### Set start/end (draw a bar)
To the right of each task is a date grid. Clicking it creates a “bar” where you can set the task’s schedule. You can move and resize the bar by drag-and-drop. The bar color is automatically determined by the assignee’s color, which you can change in user settings.
### Adjust the timeframe and balance workloads (adjust bars)
Draw a bar for each task and adjust the start and end. Ensure there’s enough time, that work isn’t overly tied to a single due date, and that it isn’t concentrated on one person.
### Tips for making Gantt charts
#### Bias adjustment
Use the "Responsible" grouping to see if work is skewed toward a particular person. In real projects, people aren’t working every minute of a timeline bar, so "overlapping bars = busy" doesn’t always hold. Discuss the plan with project managers and teammates, and adjust bars together to create a realistic schedule.
#### Aim for a solid first draft, not perfection
You can’t make a perfect plan from the start. Create a reasonable first draft—“something like this”—and move on. The time is better spent executing than polishing a plan endlessly.
#### Plans are living documents
When you make a plan, it’s easy to assume reality will follow it exactly. In practice, plans should evolve. Watch for signals outside the plan, take countermeasures, and regularly review and adjust. Let the plan grow with the project.
## How to use the Gantt chart
### Check task progress
The dark part in the bar shows the progress rate of the task (the rate at which the status is nearing completion).
### Check task details
Click the task name or bar to open the task details sidebar. You can change the assignee, update its status, add comments, and more.
### Create and search tasks
You can create and search tasks in the same way as on the task list.
### Set the display period
Click the button with "Display start date - Display end date" to display a calendar in which you can select the period. If you set the period on the calendar, you can set the display period of the Gantt chart. Click the cross button to reset to the default period. You can lock the display period with the lock button.
### Jump to today
Click the "Today" button to scroll the Gantt chart to today's position.
### View by day, week, or month
Click the "Day", "Week", and "Month" buttons to display the Gantt chart in units of each period.
### Group by List, Assignee, Ball, or Milestone
Click the "Assignee", "Ball", and "Milestone" buttons to group and display the Gantt chart by each category. "List" is displayed without grouping.
### Display information such as task name in the bar
Click the "i" button to display the task title, status, and due date to the right of the bar.
### Lock Gantt chart edits
Click the padlock button to lock the Gantt chart edits (only affects yourself). The default is locked.
### Display in due date order
Click the due date sort button to sort the tasks in the Gantt chart by due date. Since the parent-child relationship is maintained during sorting, subtasks are sorted within the due date of the parent task.
### Display progress lines
Press the lightning line button to display progress lines.
### Move task bars together
Press the move together button to be able to move task bars together. Tasks with parent-child relationships or dependencies will move together. Also, if you hold down Shift and select multiple tasks, the selected tasks can be moved together at the same time.
### Undo and redo
By pressing the "Undo" and "Redo" buttons, you can return to the previous state or redo it.
### Add milestones
You can add milestones by clicking the "Add Milestone" button and entering the milestone name and due date.
On the Milestone screen, set and group the tasks you want to complete by that milestone.
### Adjust the area width of the Gantt chart
The line between the task list part and the date part can be adjusted by drag-and-drop.
### Scroll the Gantt chart horizontally
You can scroll by using the scroll bar of the window or by dragging the date part.
## Set task dependencies
### Create task dependencies
When you hover your mouse over the bar, blue balls will appear on the left and right of the bar.
You can create a dependency by drag-and-drop the blue ball onto another task that has a dependency.
If the start of the successor task is set before the completion of the predecessor task, the dependency line will be displayed in red.
### Remove task dependencies
Open the task details screen and open the details menu below where you want to set the responsible person and status.
Since the preceding task and the succeeding task are displayed, delete them with the cross button.
## When is the Gantt chart useful?
Gantt charts are especially useful for looking at the entire project from a "time" perspective. You can visualize the flow from the beginning to the end of a project, how busy it is, task dependencies, and the resulting waits.
Gantt charts are useful when you want to schedule an overall project, or when you have an order or due date for task execution. Make sure you know who has to do what by when, and get the job done!
### Exporting and Importing
[Exporting and Importing, please see here](002012100-import-export)
## Data migration from Gantt-san to Repsona
[Please see here for data migration from Gantt-san to Repsona](004007000-gantt-san-json)
## Help Center: Manage statuses with the Kanban board
URL: https://repsona.com/help/articles/002008000-status
Markdown: https://repsona.com/help/articles/002008000-status.md
You can manage task statuses on the Kanban board in Repsona. This article explains how to use the Status view effectively.
| Who can use it | Available on |
|---|---|
| All | All |
## What is a Kanban board?
A Kanban board arranges tasks as cards in named lanes (rows). By moving cards between lanes, you can see overall status at a glance. In the Status view, each lane represents a status, and you manage tasks by moving them like cards.
Repsona automatically creates a Kanban board by status, as shown below. You can operate it easily with drag-and-drop.
## Manage task status with the Kanban board
Click "Status" in the project menu.
### Create and search tasks
You can create and search tasks in the same way as on the task list.
### Change a task’s status
Drag and drop the task card to another lane.
### Change how subtasks are displayed (Flat display)
By default, the Status view nests subtasks under their parent. To expand all subtasks and display them flat, turn on the "Flat" switch at the bottom right of the screen.
## Set status names and order
### Rename a status
Click a status name (or choose Rename from its submenu) to rename it. You can also assign colors to statuses.
*↑ submenu button*
### Add a status
Click "Add status" on the right side of the Status view.
### Change status order
Drag status lane headers to reorder them. Lanes to the right of "Closed" are treated as completed.
### Delete a status
*Owner or Admin only*
Click "Delete status" from the status submenu. Tasks with the deleted status will become unset. This action cannot be undone.
## When is a Kanban board useful?
The Kanban format is ideal for reviewing a project’s "state" at a glance. It lets you visualize overall progress and the number of tasks in progress.
For some kinds of work, it’s more effective to focus on continuous task flow rather than strict due-date management. If you can see that a particular task group (e.g., those tied to a milestone) is steadily moving forward, that may be sufficient.
For such cases, manage status-centric work on the Kanban board instead of managing each individual task by due date.
Limit work in progress and watch for stalled tasks to keep your work moving forward!
## Help Center: Manage assignees with the Kanban board
URL: https://repsona.com/help/articles/002009000-responsible
Markdown: https://repsona.com/help/articles/002009000-responsible.md
Repsona lets you manage task assignees on the Kanban board. This article explains how to use the Assignee view effectively.
In Repsona, the assignee is responsible for guiding the task to completion. They understand the task’s purpose and details, stay on top of its status, and ultimately complete it.
| Who can use it | Available on |
|---|---|
| All | All |
## What is a Kanban board?
A Kanban board has named lanes (rows) where cards are arranged. You can move cards to understand the overall status. In the Responsible view, you create lanes for each assignee and manage tasks by moving them like cards.
You can quickly see how tasks are distributed across assignees.
Repsona automatically creates a Kanban board for each assignee, and you can easily use it with drag-and-drop.
## Manage assignees on the Kanban board
Click "Responsible" in the project menu.
### Create and search tasks
You can create and search tasks in the same way as on the task list.
### Change a task’s assignee
Drag and drop the task card to change its assignee.
## When is this Kanban board useful?
The Kanban format is useful for reviewing a project’s overall state at a glance. Viewing tasks by assignee makes it easy to see how work is distributed. Watch for tasks concentrating on a specific person.
## Help Center: Manage ball holders with the Kanban board
URL: https://repsona.com/help/articles/002010000-ball
Markdown: https://repsona.com/help/articles/002010000-ball.md
Repsona lets you manage ball holders for tasks on the Kanban board. This article explains how to use the Ball view effectively.
In Repsona, a “ball” is the person who temporarily has the ball to move a task forward—for example, someone you’ve asked for a reply or a result and are waiting on.
| Who can use it | Available on |
|---|---|
| All | All |
## What is a Kanban board?
A Kanban board is a board with named lanes (rows) where cards are arranged. You can move cards to understand the overall status. On the Ball view, you can create lanes for each ball holder and manage tasks while moving them like cards.
You can see at a glance how tasks are distributed across ball holders.
Repsona automatically creates a Kanban board with lanes for each ball holder, and you can easily use it with drag-and-drop.
## Manage ball holders for tasks with the Kanban board
Click "Ball" in the project menu.
### Create and search tasks
You can create and search tasks in the same way as on the task list.
### Change a task’s ball holder
Drag and drop the task card to change its ball holder.
## When is this Kanban board useful?
The Kanban board format is suitable for looking over a project and understanding its overall state. Viewing ball holders in a Kanban format lets you see at a glance how tasks are distributed. If the ball is concentrated on a particular person, progress may stall or there may be long wait times. Consider sharing the load.
## Help Center: Manage priorities with the Kanban board
URL: https://repsona.com/help/articles/002011000-priority
Markdown: https://repsona.com/help/articles/002011000-priority.md
Repsona lets you manage task priorities on the Kanban board. This article explains how to use the Priority view effectively.
In Repsona, you can set priority to one of “no priority,” “↓ low,” “→ medium,” or “↑ high.” When you set a priority, colored arrows appear on the task list and task cards. This is useful for sorting tasks and understanding their priorities.
| Who can use it | Available on |
|---|---|
| All | All |
## What is a Kanban board?
A Kanban board is a board with named lanes (rows) where cards are arranged. You can move cards to understand the overall status. On the Priority view, you can create lanes for each priority and manage tasks while moving them like cards.
Repsona automatically creates a Kanban board with lanes for each priority, and you can easily use it with drag-and-drop.
## Manage task priorities with the Kanban board
Click "Priority" in the project menu.
### Create and search tasks
You can create and search tasks in the same way as on the task list.
### Change task priority
Drag and drop the task card to change its priority.
## Help Center: Manage task milestones
URL: https://repsona.com/help/articles/002012000-milestone
Markdown: https://repsona.com/help/articles/002012000-milestone.md
Repsona lets you track progress toward goals by creating milestones and grouping tasks. Learn how to create and manage milestones.
| Who can use it | Available on |
|---|---|
| All | All |
## What is a milestone?
Milestones are checkpoints on your schedule. By grouping tasks that are scheduled to be completed by a specific milestone and setting a due date, it will be easier to check the progress of tasks up to the milestone.
With Repsona, you can manage the following by creating milestones.
### Check the burndown chart
When you group tasks by milestone and set due dates, a burndown chart is generated automatically. It shows the number of unfinished tasks over time, so you can see at a glance how many tasks need to be completed—and at what pace—by the milestone due date.
Gray is the ideal line, yellow is the planned line, and blue is the actual line. The planned line is calculated from the due dates set for each task. The actual line shows the count of tasks that have reached Done as of each date.
### Check milestones on the Gantt chart
When you create a milestone with a due date, you will see a vertical green line on the Gantt chart. You can visually see the milestone due date on the Gantt chart.
If you click the "Milestone" button that is displayed in units of "List", "Resp", and "Milestone", the Gantt chart will be displayed in a grouped form for each milestone, and you can check the plan for each milestone.
## Manage milestones
Click "Milestones" from the "Project Menu".
### Create milestones
You can create milestones from the + button.
Enter the milestone name and due date and click Create.
### Group tasks by milestone (set milestones for tasks)
From the task list in the left pane, drag-and-drop within the milestone frame to move the task into the dropped milestone. The task is now set to a milestone.
You can also set it from the task details milestone pull-down.
### Change milestone due date
You can change the due date of a milestone by opening the calendar with the date button to the right of the milestone name. Click the cross button to cancel the due date.
### Close milestones
You can close the milestone by clicking the "Close" button. Close completed milestones. It will not be displayed from the list of milestones.
### Reopen milestones
To resume a closed milestone, turn on the "Show Completed" switch at the top of the screen and click the "Re-open" button for the displayed milestone.
### Check the progress of milestones
The blue progress bar in the milestone frame shows the progress of the tasks in the milestone. It shows the progress rate (the rate at which the status is approaching completion) of the task within the milestone.
### Carry tasks within a milestone to the next milestone
Click the "Carry Forward" button to carry over unfinished tasks to the next milestone.
### Delete milestones
You can delete milestones from the submenu to the right of the due date button. This operation is irreversible.
## Help Center: Exporting and Importing Tasks
URL: https://repsona.com/help/articles/002012100-import-export
Markdown: https://repsona.com/help/articles/002012100-import-export.md
Repsona allows you to export and import tasks in CSV format and Gantt-san format. It also supports exporting in XLSX and PDF formats.
| Who can use this feature | Plans that can use this feature |
|--------------------------|---------------------------------|
| Everyone | All plans |
## Export and Import from Submenu
You can export and import from the submenu on the task list or Gantt chart screen.
*↑ Submenu button*
## Exporting
You can export in CSV, Gantt-san JSON, XLSX, and PDF formats.
### CSV Export
Select "CSV Export" to export in CSV format. This format uses a CSV layout that can be imported back into Repsona.
### Gantt-san Export
Select "Gantt-san Export" to export in Gantt-san JSON format. This format can be imported and used in Gantt-san.
[Free Gantt chart tool available to everyone without login](https://repsona.com/en/lp/free-gantt)
### XLSX Export
Select "XLSX Export" to export in a format that can be opened in Excel.
### PDF Export
Select "PDF Export" to export in a print-friendly format.
## Importing
You can import CSV and Gantt-san JSON formats.
### CSV Import
Select "CSV Import" to import CSV format files.
Download Sample CSV
| Column | Field Name | Description | Example |
|-----------------|-------------|-------------------------------------------------------------------------------------|------------------------------------------------------------------------------------------------------------------------------------------------------------------------------------------------------------|
| id | ID | A unique ID to identify the task. Can be any string. | 1 |
| name | Task Name | Name of the task | Agree budget |
| description | Description | Description of the task | It involves organizing estimated costs, breakdowns, and budget limits, then sharing them with relevant teams and decision-makers.If needed, adjustment options are proposed and final approval is secured. |
| responsibleUser | Assignee | Specify the username of the assignee. Must be a member in the space. | Reon |
| ballHoldingUser | Ball Holder | Specify the username of the ball holder. Must be a member in the space. | Seb |
| startDate | Start Date | Specify in YYYY-MM-DD format. | 2024-01-01 |
| dueDate | Due Date | Specify in YYYY-MM-DD format. | 2024-12-31 |
| status | Status | Specify the task status. Must exist in the project. | Doing |
| milestone | Milestone | Specify the task milestone. Must exist in the project. | v1.37.0 |
| parent | Parent ID | Specify the parent task ID. Use the ID specified in task ID. | 4 |
| tags | Tags | Specify tags separated by commas. | tag1,tag2 |
| planned | Planned | Specify planned work hours etc. Free unit. | 5 |
| actual | Actual | Specify actual work hours etc. Free unit. | 5 |
| sortOrder | Sort Order | Specify display order when importing list. Smaller values are displayed at the top. | 1 |
### Gantt-san Import
Select "Gantt-san Import" to import Gantt-san JSON format. You can import files exported from Gantt-san into Repsona.
Download Sample JSON
[For data migration from Gantt-san to Repsona, please see here](004007000-gantt-san-json)
## Help Center: Create, share, and manage notes to promote information sharing
URL: https://repsona.com/help/articles/002013000-note
Markdown: https://repsona.com/help/articles/002013000-note.md
With Repsona, you can create notes (Markdown-compatible) to capture your team’s know-how, organize it, and share it. This article explains how to create and manage notes.
## Information sharing using Repsona
As your project progresses, streamline work by putting shareable information in your work management tool where everyone can access it easily.
For example, when a new teammate joins a project, it’s helpful to say, “Please start here,” and “If you’re unsure, check this page.”
- The first thing to do when you join
- Explanation of information and terms unique to this project
- Procedure for some work
- Meeting Agenda and Minutes
- Record when there is a problem
etc.
By writing down information that tends to be buried in email or lost in chat—and managing it centrally in Repsona Notes—you can save significant time otherwise spent organizing and searching.
| Who can use it | Available on |
|---|---|
| All | All |
## Create a note
Click "Notes" in the project menu.
You can create a note from the + button.
Click the + button to create a note and open the note editor. Click "Update" to save the note, or "Update and exit" to save and return to the note list.
### Title
Enter the title of the note. Give a title that is easy to understand at a glance, such as "Procedure for XX", "Regular meeting on XX", "Progress meeting on XX", "What to do when XX occurs"
### Location
You can set the location of the note (note parent = something like a folder). Once set, it can be set as a sub-note for that note. If you select "(Top)", it will not be a sub-note of any note.
### Tags
You can add tags to notes. Use them to categorize content (e.g., by topic or team). Tags are color-coded, making lists easier to scan.
## Write a note
Below the title is a note editor. Please write the contents of the note here. Notes can be written in Markdown format.
### You can write in Markdown
You can use Markdown for details and comments. Markdown is a simple text-based "writing notation" that lets you structure your document with bold, italics, headings, and more.
### Checklists (checkboxes)
If you create a checklist with markdown, you can check the progress of a small list of tasks in a note as you check them off. You can create a checklist by writing as follows.
```
[x] Todo A
[ ] Todo B
[ ] Todo C
```
You will be able to click on/off on the checklist.
## Save as a note in progress
If you turn on the "WIP" switch and save it, it will be saved as a work-in-progress note. "This note is work-in-progress" is displayed at the top of the note article. A yellow draft icon is displayed on the list.
## View a note's activity log
*↑ submenu button*
You can view the activity log from the submenu to the right of the note title. You can check the history of the note's updates so far.
## View the edit history of a note
You can view the edit history from the submenu to the right of the note's title. You can see the history of the note's content as it has been updated.
The version information remains at the time of the update, and you can check the differences at that point in time. You can roll back to the current note from the Version menu.
## Print (or save as PDF) notes
You can print (or save as PDF) notes from the submenu to the right of the note title. The browser's standard print preview will appear, and you can print (or save the PDF) using your preferred settings.
## Search for notes
You can search for notes by clicking the search button in the note list. Enter "keyword" and "tag" to execute the search. If you turn on the "WIP" switch, you can search for work-in-progress notes.
## Organize your notes
In the note list, you can reorder the notes by dragging the drag handles. It's easy to turn a note into a sub-note or take the sub-note out.
You can change a note to a sub-note just like changing a paragraph in the popover menu.
## Tips for making information sharing meaningful
In order to make information sharing as a team meaningful, it is important to think that "even if it is halfway, write it down and grow it." Even if the content is incomplete, we recommend that you start writing small. If you are worried about halfway, save it as "WIP" and cancel it when the degree of completion is improved.
Small notes and pieces of notebooks, when gathered together, are very important information and treasures for getting the job done. It is important to have a habit of casually writing rough text, regardless of layout, decoration, or perfection.
Information is a living thing. The notebook that has been "completed" by canceling "WIP" should be updated and grown according to the times. The notes created in the project will become the strongest document with plenty of know-how that you can not find even if you look it up with a search engine.
## Help Center: How to use the Markdown editor for notes
URL: https://repsona.com/help/articles/002014000-note-editor
Markdown: https://repsona.com/help/articles/002014000-note-editor.md
With Repsona, you can create notes (Markdown-compatible) to capture team know-how, and organize and share information. Learn how to use the Markdown editor for notes.
| Who can use it | Available on |
|---|---|
| All | All |
## What is Markdown?
Markdown is a lightweight markup language for writing. You can write in plain text, apply formatting like bold or italics, and structure documents with headings.
Because it’s just text (plain text), you can start writing immediately—like jotting notes—without worrying about layout. Focus on the work of writing, not on adjusting paragraphs or positions.
This help site is also written in Markdown.
## Features of Markdown
- Everyone can write easily
- Read as it is
- You can decorate and structure beautifully with a little ingenuity.
- Used in various services
- Since it is text, the difference is easy to understand
## Example of how to write Markdown
For example, if you write a list in Markdown as follows,
```text
- List 1
- List 2
- List 3
```
It will be automatically converted to HTML and displayed as below.
---
- List 1
- List 2
- List 3
---
## How to use the Markdown editor for notes
### Create a note
You can create a note from the + button.
Click the + button to create a note and open the note editor screen.
### Decorate the text
You don’t need to memorize Markdown. Repsona’s note editor has a toolbar that inserts the notation for you.
#### Heading
Click the heading button to insert a `#`. The character written after `#` becomes the "heading".
#### Bold
Click the bold button to insert `****`. Select the character you want to make bold and click this button to make it bold, surrounded by `**`.
#### Italic
Click the italic button to insert `**`. Select the character you want to italicize and click this button to italicize surrounded by `*`.
#### Strikethrough
Click the strikethrough button to insert `~~~~`. Select the character you want to cancel and click this button to cancel it by enclosing it in `~~`.
#### Link
Click the link button to insert `[link text](URL)`. Enter the URL and link text to create the link. The `link text` is the clickable label.
#### List
Click the list button to insert a `-`. If you enter a character and press enter, the next line will also be automatically listed.
#### Numbered list
Click the numbered list button to insert `1.`. When you type a letter and press enter, the next line will automatically be a numbered list as well.
#### Checklist
Click the checklist button to insert `[ ]`. If you want to check it, enter `[x]`.
#### Table
Click the table button to insert the description for the table.
#### Quote
Click the quote button to insert `>`. Select the character you want to quote and click this button to start quoting with `>`.
#### Code
Click the code button to wrap content in ```. If you want to show text without formatting, enclose it in a code block. Select the text and click this button to wrap it in a code block.
#### Image
Insert images by dragging and dropping them into the editor. You can also paste or type an image URL to insert it into the document.
```
```
## If you find Markdown difficult, just write it in text
Repsona's note editor supports Markdown, but it's just a text editor (Notepad). Feel free to write a text.
Too much attention to the layout and decoration of the text makes it difficult to get around to the "contents" that should be described in detail. Simply focus on writing the text and put off the layout and decoration.
## Help Center: How to write Markdown
URL: https://repsona.com/help/articles/002015000-markdown
Markdown: https://repsona.com/help/articles/002015000-markdown.md
You can create team knowledge notes in Repsona (Markdown-compatible) to organize and share information. This article explains how to write Markdown.
| Who can use it | Available on |
|---|---|
| All | All |
## What Is Markdown?
**Markdown** is a simple text-based markup language that lets you write using plain text while easily adding formatting such as *bold*, *italics*, and headings.
Because it’s just plain text, you can start writing immediately—no complex formatting or software required. It lets you focus on the essence of “writing,” without getting distracted by adjusting layouts or figuring out how an app works.
In fact, this help site itself is written in Markdown.
## Features of Markdown
- Easy for anyone to write
- Readable as plain text
- Simple syntax for clean formatting and structure
- Supported by many platforms and services
- Since it’s plain text, changes and differences are easy to track
## How to write Markdown
### Heading
Use `#` for the heading. Increasing the number of `#` will result in a deeper hierarchy of headings.
```
# Heading h1
## Heading h2
### Heading h3
#### Heading h4
##### Heading h5
###### Heading h6
```
Heading h1
Heading h2
Heading h3
Heading h4
Heading h5
Heading h6
### Bold
Enclose it in `**` to make it bold.
```
** Emphasis (bold) **
```
**Emphasis (bold)**
### Italic
Enclose it in `*` to make it italic.
```
*Emphasis (italic)*
```
*Emphasis (italic)*
### Strikethrough
If you enclose it in `~~`, it will be a strikethrough.
```
~~strikethrough~~
```
~~strikethrough~~
### Link
Links can be written as `[link string] (URL)`.
```
[Repsona website](https://repsona.com)
```
[Repsona website](https://repsona.com)
### List
Use `-` for the list. You can start a new line and make a list continuously. You can move down the hierarchy with tabs.
```
- List
- List
- List
```
- List
- List
- List
### Numbered list
Use `1.` for numbered lists. You can start a new line and make a list continuously. You can move down the hierarchy with tabs.
```
1. List
1. List
1. List
```
1. List
1. List
1. List
### Checklist
Use `[ ]` for the checklist. To check it, use `[x]`.
```
[ ] Checklist
[x] Checklist
```
Checklist
Checklist
### Table
Write the table by enclosing it like a table using `|` or `-`.
```
| Left align | Right align | Center align |
|:-----------------|------------------:|:------------------:|
| This | This | This |
| column | column | column |
| will | will | will |
| be | be | be |
| left | right | center |
| aligned | aligned | aligned |
```
| Left align | Right align | Center align |
|:-----------------|------------------:|:------------------:|
| This | This | This |
| column | column | column |
| will | will | will |
| be | be | be |
| left | right | center |
| aligned | aligned | aligned |
### Quote
Use `>` for citations.
```
> Quote
>> Quote
```
> Quote
>> Quote
### Code
Enclose the code in ```. It also supports code syntax.
```js
console.log('code with syntax')
```
```js
console.log('code with syntax')
```
## Help Center: Teammate profile
URL: https://repsona.com/help/articles/002016000-profile
Markdown: https://repsona.com/help/articles/002016000-profile.md
Repsona is built on a people-centered concept: "knowing people" is essential for teams. This article describes the profile screen and how to use it.
| Who can use it | Available on |
|---|---|
| All | All |
## Profile screen
When you’re invited to a Repsona space (or create one) and your account is created, you join that space as a teammate (member).
### View my profile screen
Open the settings menu from the icon in the upper-right corner of the screen.
Open your profile by clicking your name at the top, on the home screen, or in the comments section. Your latest activity and main tasks are displayed.
Your name, profile image, background image, and introduction (set in User Settings > User Information) are shown. Fill these out so teammates can understand who you are and what you’re working on.
### View a member’s profile
Click a member’s name (e.g., in the comments) to open their profile. Their latest activity and main tasks are displayed.
The information set by that member is displayed. Similar to your profile screen.
Write an "Introduction from teammates" to introduce this member to others.
### Reactions
The reactions sent in the comment section etc. will be gathered on the person's profile screen.
Skill tags such as "programming" and "design", messages such as "thank you" and "sorry", pictograms, and other skills of the person and sent messages are collected. So you can see at a glance what role they play in team activities and how they communicate.
## Set up a profile
Click "Settings" on your profile to go to User Settings > User Profile, where you can set or change your profile.
### Status
#### Today's Todo
Tasks that this member has set as "Today" from the task details are displayed. "Today" is automatically removed the next day, so it's useful for listing what you should focus on today.
#### Completed tasks
Completed tasks by this member are displayed.
#### Tasks with Activity
Tasks that have been moved by this member's activities are displayed. You can specify the period of movement.
#### Upcoming Schedule
The future schedule of this member is displayed. Only tasks whose specified period is the scheduled working period are displayed.
### Profile
#### Activity
Activities related to this member are displayed. When you comment or update a task, the activity is displayed here.
#### Introduction
Self-introduction by the member and reactions from other members are displayed. You can also write introduction texts from other members. Please write an introduction to introduce this member to other members.
## How to use profile
Repsona is continuously being upgraded as a human-centered work management tool. We are developing a system for managing people, setting goals, and evaluating them, centered on the profile screen.
## Help Center: Project profile
URL: https://repsona.com/help/articles/002017000-project-profile
Markdown: https://repsona.com/help/articles/002017000-project-profile.md
We believe that understanding the project and building empathy for the work improves teamwork. Enhance your project profile to build a better team. This article describes the project profile screen and how to use it.
| Who can use it | Available on |
|---|---|
| All | All |
## Project profile screen
After creating a project, you can display the project home (project profile screen) with the "Home" button on the far left.
The contents set in the project settings are displayed on this screen.
## Set a project profile
You can move to the project settings screen from the "Settings" button on the project profile screen.
Set it so newcomers and stakeholders can understand the project at a glance—and so long-time teammates stay motivated.
*"Settings" requires Owner or Admin privileges.*
### React
You can react to the project on the project home. Use tags to express the type of project, or show appreciation with emoji.
### Status
#### Today's Todo
Tasks that members participating in the project have set as "Today" are displayed. "Today" is automatically removed the next day, so it's useful for listing what you should focus on today. For example, when team members confirm what they are going to do today at a morning meeting, setting "Today" in advance makes the confirmation simpler.
#### Completed tasks
Completed tasks by this member are displayed. It's useful for checking recently completed tasks.
#### Tasks with Activity
Tasks that have been moved by the activities of members participating in the project are displayed. You can specify the period of movement. It's useful for reviewing the specified period.
#### Upcoming Schedule
The future schedule of members participating in the project is displayed. Only tasks whose specified period is the scheduled working period are displayed. It's useful to specify a period and check what should be done during that period.
### Profile
#### Activity
Activities related to members participating in the project are displayed. When you comment or update a task, the activity is displayed here.
#### Purpose
Articulate the purpose of this project. Please describe the "important reason why we are here" so that new members who join the project can understand the purpose of this project, and so that project members can be excited.
#### Product concept image
Set an image so that project members and new members who join the project can see at a glance what this project is like, what the project looks like, and what its purpose is.
## Help Center: Visualize teammates and team structure (org chart)
URL: https://repsona.com/help/articles/002018000-teammate
Markdown: https://repsona.com/help/articles/002018000-teammate.md
Repsona lets you visualize your teammates and team structure (org chart). Visualizing the team makes roles and communication paths clear. Learn about the Teammates feature and how to use it.
| Who can use it | Available on |
|---|---|
| All | All |
## Teammates screen
Click "Teams" in the project menu.
### Positions and strengths or expectations
Click the + button to add a "position." Enter the position name and the teammate’s strengths or expectations. You can then set that position for a teammate. Clarifying positions helps teammates reaffirm their responsibilities and helps new members know who to contact and how.
### Project community
This represents everyone involved in the project. If someone isn’t listed here, create a "no-login" member and add them to the project to include them in the project community. (You can also assign them as an assignee or ball holder.)
If the project community includes groups such as companies, organizations, or teams, click the + button below to add a "Team" and give it a name. (From the second one onward, use the "Add team" button above.) You can sort items by drag-and-drop, and create nested teams.
Drag-and-drop members from the project community into teams, and assign them a "position." Build a team structure (org chart) that’s easy to understand at a glance.
## Help Center: Visualize project data with charts
URL: https://repsona.com/help/articles/002019000-chart
Markdown: https://repsona.com/help/articles/002019000-chart.md
Repsona visualizes project status and activity with charts. This article explains the chart screen and how to use it.
| Who can use it | Available on |
|---|---|
| All | All |
## Chart screen
Click "Charts" in the project menu.
Repsona currently provides three types of charts:
### Cumulative flow chart
Shows a stacked chart of task statuses across the project. You can see at a glance how many tasks are not started, in progress, and completed.
### Tag breakdown
Shows the proportion of tags in your project. For example, if you tag tasks with department or category, you can quickly see whether work is skewed toward a particular tag.
### Burndown chart
Shows how many unfinished tasks remain and the pace required to reach the milestone due date.
Gray is the ideal line, yellow is the planned line, and blue is the actual line. The planned line is calculated from due dates set on tasks. The actual line shows the number of tasks that have reached Done (completion status) by each date.
### Other charts
We plan to add more charts to help visualize team productivity. Repsona is continuously improving.
## Help Center: Visualize team productivity with charts
URL: https://repsona.com/help/articles/002020000-productivity
Markdown: https://repsona.com/help/articles/002020000-productivity.md
Repsona visualizes productivity. Our goal is a world where people are recognized fairly for their work and responsibilities. This page explains the Productivity screen.
| Who can use it | Available on |
|---|---|
| All | All |
## Productivity screen
Click "Productivity" in the project menu.
Productivity charts show activity for each person.
### Score
Totals a member’s recent activity into a single score.
### Heat map
Days with activity are colored blue; darker means more activity.
### Done tasks
Count of tasks this member marked as Done.
### Done tasks (responsible)
Count of completed tasks the member was responsible for. For example, if the responsible member reports completion and the project lead sets the task to Done, the count increases here.
### Done tasks (involved)
Count of tasks that reached Done where the member held the ball at least once (e.g., temporarily held the ball while the task progressed).
### Received tasks
Count of new balls received (work taken on).
### Reactions
Number of reactions sent.
### Reactions received
Number of reactions received.
### Contributions to notes
Number of notes created or updated.
### Comments
Number of comments posted.
### Total
Sum of the above numbers.
## About the score
Repsona’s productivity score is simple. If there’s no movement—no responsibilities taken, no ball received, no contributions to notes, no productive activity—the number won’t increase. Flat charts generally indicate low activity.
However, activity volume alone doesn’t equal impact. For example, many reactions or comments don’t necessarily mean the work advanced. When reviewing productivity and scores, evaluate not only the numbers but also the substance of the activity and the positive reactions received.
Repsona is continuously improving as a people‑centered work management tool. We’ll keep refining these evaluation mechanisms to make them more useful.
## Help Center: Kaizen for team retrospectives (KPT)
URL: https://repsona.com/help/articles/002021000-kaizen
Markdown: https://repsona.com/help/articles/002021000-kaizen.md
Repsona values retrospectives for healthy team activity. As a simple framework, we provide a Kanban board based on the KPT method by default. This page explains how to use the Kaizen screen.
| Who can use it | Available on |
|---|---|
| All | All |
## Kaizen screen
Click "Kaizen" in the project menu.
### What is the KPT method?
KPT stands for Keep, Problem, and Try:
- Keep: continue what worked well
- Problem: identify issues
- Try: experiment with improvements
### Kaizen and retrospectives in Repsona
Rather than strictly following a framework, Repsona recommends lightweight, continuous retrospectives. Keep it simple and easy to sustain so you can steadily improve team issues.
## Retrospective
At the end of a project, review the whole effort: summarize what went well and what didn’t. Ideally, you surface questions and issues before a project ends, too.
We recommend weekly or monthly reviews. Assume there are always opportunities for improvement in day‑to‑day work: visualize issues, link them to tasks, and work toward solutions.
Also capture the team’s “good points.” Visualize and Keep them so everyone can see strengths regularly—it helps morale and alignment.
## How to proceed with Kaizen
### Create a Problem
Click the + button to add a “Problem.”
Examples: “Our team isn’t lively,” “The office is cold,” “Article production takes too long.” Feel free to propose problems at any level—company, organization, team, individual, or project.
You don’t need to start with big problems. Start small. You also don’t need solutions right away—the key is to capture what feels like a problem.
### Try: link tasks to problems
Define concrete actions to resolve the problem—i.e., tasks. On a Problem card, select an existing task from the dropdown, or create a new one.
Assign responsibility and a due date to the tasks, then move the Problem card to the Try lane.
### Keep: solved problems and team strengths
Once all tasks linked to a Problem are complete and the issue is resolved—or a good habit has taken hold—you can give it a name and Keep it as a team practice.
## Some problems can’t be solved—and that’s okay
Not every issue has a fix. Decide how to handle such problems and accept them when necessary.
By acknowledging issues openly rather than ignoring them—and by visualizing them as Problems you Keep—the team’s awareness and cohesion improve.
## Help Center: What's happening?
URL: https://repsona.com/help/articles/002022000-now-comment
Markdown: https://repsona.com/help/articles/002022000-now-comment.md
*This feature has been discontinued.*
Repsona included a social-style post feature called “What’s happening?” on the home screen. This page explains how it worked.
| Who can use it | Available on |
|---|---|
| All | All |
## “What’s happening?”
Go to the home screen from the leftmost icon in the main menu.
You could post from the text field labeled “What’s happening?”.
Posts appeared in the home feed of members in the same project. When you mentioned someone, they were notified.
## How it was used
It was intended for lightweight communication not tied to a specific project or task—quick chats among project members, questions and answers, and small comments.
## Help Center: Reaction and how it works
URL: https://repsona.com/help/articles/002023000-reaction
Markdown: https://repsona.com/help/articles/002023000-reaction.md
You can add reactions to comments in Repsona. This article explains how to use reactions.
| Who can use it | Available on |
|---|---|
| All | All |
## React to comments
Click the "Reaction" button to add a reaction.
You can use emoji ( 👍 😄 😇 😍 🎉 ❤️ ) and tags for reactions.
For gratitude, use tags like "Thank you" or "Thanks!" For skill recognition, use tags such as "Design", "Python", or "Genius". When you need help or clarification, use tags like "Tell me" or "Question". Use any tag that fits the situation.
Reactions are collected on each member’s profile. Over time, they reflect what teammates appreciate and recognize—skills, contributions, and more—so you can get a feel for your teammates at a glance.
## Help Center: Task and note templates
URL: https://repsona.com/help/articles/002024000-template
Markdown: https://repsona.com/help/articles/002024000-template.md
Repsona provides templates for tasks and notes. Templates let you instantly reuse common structures. This page explains how to use templates.
| Who can use it | Available on |
|---|---|
| All | All |
## Tasks
### Create a template
Open the create-task modal from the task list using the + button.
Click the template dropdown at the lower left (defaults to "No template") and select "Add template".
Enter the template name, tags, title, and details, then click "Create" to save the template.
### Use a template
Open the template dropdown at the lower left and select the template you want to use. The template’s contents are inserted automatically. Selecting another template overwrites existing fields with that template’s values.
### Edit a template
Open the template dropdown at the lower left and select "Edit template" to go to the Templates screen in project settings.
You can also open the same screen from the Templates tab in project settings.
Click the Edit link for a template in the task template list.
Make your changes and click "Update".
You can reorder templates by dragging the drag handles.
## Notes
### Create a template
Open the note editor from Notes > +.
Click the template dropdown at the lower right of the editor (defaults to "No template") and select "Add template".
Enter the template name, tags, title, and details, then click "Create" to save the template.
### Use a template
Open the template dropdown at the lower right of the editor and select the template you want to use. The template’s contents are inserted automatically. Selecting another template overwrites the current content with the new template’s values.
### Edit a template
Open the template dropdown at the lower right of the editor and select "Edit template" to go to the Templates screen in project settings.
You can also open the same screen from the Templates tab in project settings.
Click the Edit link for the template you want to modify in the note template list.
Make your changes and click "Update".
You can reorder templates by dragging the drag handles.
## Tips for using templates
Templates help you save recurring items in similar tasks and meeting notes so you can insert them instantly. Save frequently used fields and document structures as templates to reduce repetitive work and avoid unnecessary back‑and‑forth by clearly listing what’s needed when creating a task.
## Help Center: Inbox
URL: https://repsona.com/help/articles/002025000-inbox
Markdown: https://repsona.com/help/articles/002025000-inbox.md
Repsona helps teammates communicate to keep work moving forward. Messages such as comments, assignments, ball assignments, status changes, and more are collected in your inbox.
| Who can use it | Available on |
|---|---|
| All | All |
## Check your inbox
Click the Inbox button in the main menu to open your inbox.
### Confirm messages
Unread messages appear on the "Unread" tab. Messages related to the same task or note are grouped into a thread. Click "Got it" to mark a message as read.
The "Archived" tab shows messages you’ve read. You can mark a message as unread by clicking "Unread".
Click "Got it all" to mark all messages as read.
### View threads
Click "Thread" to view the full thread for a message. The button shows the number of unread messages in the thread. When everything is read, you can mark the entire thread as read.
## Help Center: Repsona keyboard shortcuts
URL: https://repsona.com/help/articles/002026000-keyboard-shortcuts
Markdown: https://repsona.com/help/articles/002026000-keyboard-shortcuts.md
Use keyboard shortcuts to work in Repsona more efficiently.
| Who can use it | Available on |
|---|---|
| All | All |
## Keyboard shortcuts
| Action | Shortcut |
|---------------------------|----------|
| Open global search | `/` |
| Open the task creation modal | `c` |
## Help Center: Manage space settings
URL: https://repsona.com/help/articles/003001000-admin-space
Markdown: https://repsona.com/help/articles/003001000-admin-space.md
In Repsona, members, projects, tasks, notes, and more are managed within a single "space." This article explains how to configure space settings.
| Who can use it | Available on |
|---|---|
| Owner | All |
## Open space settings
1. Open the settings menu from the icon in the upper-right corner of the screen.
2. Click "Administrator Settings".
3. Open the "Space profile" tab.
### Space name (URL)
You can set the space name (URL). The `xxx` in `xxx.repsona.com` must be 3–30 characters, using lowercase letters, numbers, and hyphens ("-"). You can change it at any time.
If you change the URL, the old URL will no longer be accessible and all members will be logged out. Be sure to notify members of the change.
### Full name (official name)
Set the official name of the space. Enter the name of the organization or company the project team belongs to.
### Space language
Set the primary language used in the space. It affects system notifications, invitation emails, and other space-wide messages.
### Information
Display announcements to members who use Repsona in this space. Use this for internal notices.
### Delete your space
You can delete the space. Once deleted, this action cannot be undone. You will lose access to all data in the space. Spaces cannot be deleted if there is an active paid plan.
## Help Center: Manage space members (set role and billing status)
URL: https://repsona.com/help/articles/003002000-admin-member
Markdown: https://repsona.com/help/articles/003002000-admin-member.md
Manage members in your Repsona space. Learn how to invite members and change permissions.
| Who can use it | Available on |
|---|---|
| Owner, Admin | All |
## Manage space members
1. Open the settings menu from the icon in the upper-right corner of the screen.
2. Click "Administrator Settings".
3. Open the Members tab.
### Invite new members
1. Click the "Invite new member" button.
1. Enter the member’s email address and username, choose the project to invite them to, then click the "Invite" button.
Members invited to the space will receive an email with a link to join Repsona. They can set a password and log in.
You can also share an invitation link to invite members to the space.
### Create a no-login member
1. Click the "Invite new member" button.
1. Enter the username and other details.
1. Uncheck "Allow login".
1. Click the "Create" button.
By adding a member who cannot log in to a project, you can still assign an assignee or a ball to that member.
For example, create an external partner (outside your team) or a business contact as a "no-login" member. By including that member in the project, you can identify who has the ball during your work interactions.
### Set role
*Owner only*
You can set and change member privileges. Choose from "Owner", "Admin", "Member", and "no-login". If an owner changes another member to "Owner", they immediately switch to "Admin" and lose owner privileges.
### Set billing status
You can set and change the billing status. Choose from "Active" or "Inactive". On paid plans, there is a charge per active member. Members other than "Active" are not counted as active.
### Inviting members
Operations can be performed from the submenu.
*↑ submenu button*
#### Set an email address and invite
If you want to change the email address of an invited member and re-invite them, set the new email address and click the "Send invitation email" button.
If you set the email address for a no-login member and click the "Send invitation email" button, you can invite them to the space as a member who can log in.
#### Change information
You can change the username and full name of the invited member. Information for members who have already joined the space can only be changed by that member.
#### Revoke invitation
Revoke the invitation. This operation is irreversible.
### Deactivate members
You can deactivate members from the submenu. Deactivated members will be removed from selection lists such as project participation lists.
## Help Center: Set up an invitation link to the space
URL: https://repsona.com/help/articles/003003000-admin-invitation
Markdown: https://repsona.com/help/articles/003003000-admin-invitation.md
You can create an invitation link to invite members to your Repsona space. Anyone with the link can join. This article explains how to create and manage invitation links.
| Who can use it | Available on |
|---|---|
| Owner, Admin | All |
## Set up an invitation link to the space
1. Open the settings menu from the icon in the upper-right corner of the screen.
2. Click "Administrator Settings".
3. Open the "Invitation links" tab.
### Create an invitation link
1. Click the "Create invitation link" button.
2. Set the link’s expiration date and the project to invite people to, then click "Create".
3. The link URL is generated. Share it by email or your preferred method.
### Share the invitation link
1. Click the "Copy" button.
2. The URL is copied and ready to paste.
3. Send the URL to the person you want to invite by email or another contact method.
Anyone can join the space by opening the shared URL and entering their email address.
### Invalidate invitation links
Click the "Invalidate" button to disable a link. This action cannot be undone. To invite someone later, create and share a new link.
## Help Center: Set up projects and project members
URL: https://repsona.com/help/articles/003004000-admin-project
Markdown: https://repsona.com/help/articles/003004000-admin-project.md
This article explains how to set up a project in your Repsona space and add members to it.
| Who can use it | Available on |
|---|---|
| Owner, Admin | All |
## Set up projects and project members
1. Open the settings menu from the icon in the upper-right corner of the screen.
2. Click "Administrator Settings".
3. Open the "Projects" tab.
### Create a project
You can create a project with the + button.
*On the Free plan, you can create only one project.*
Set the project’s official name, project name, and initial members, then click "Create".
### Configure a project
Click the "Settings" link to the right of the project name to open project settings. You can also open the same screen from the settings button in the project menu.
### Set project members
From the "Add member" dropdown under the project name, select and add a member. To remove a member, click the cross button at the upper right of their name.
### Close the project
Click "Close" to close (complete) the project. Closed projects are excluded from the "Select a project" list.
### Reopen the project
To reopen a closed project, turn on the "Show closed" switch at the top of the screen and click the "Re-open" button for the project.
## Help Center: Duplicate a project
URL: https://repsona.com/help/articles/003004100-admin-project-duplicate
Markdown: https://repsona.com/help/articles/003004100-admin-project-duplicate.md
You can duplicate a project in your Repsona space. This is useful for creating a template you can reuse. This page explains how to duplicate a project.
| Who can use it | Available on |
|---|---|
| Owner, Admin | Standard plan |
## Duplicate a project
1. Open the settings menu from the icon in the upper-right corner of the screen.
2. Click "Administrator Settings".
3. Open the "Projects" tab.
### Steps
1. Click the "Duplicate" button for the project you want to duplicate.
2. Set the project’s official name and project name. If the name is already in use, choose a different name.
3. Set the project start date.
4. Set the initial members.
5. Click "Duplicate".
Depending on the number of tasks, creating the new project may take some time. Task comments, statuses, assignees, and balls are cleared. Notes, teammates, and Kaizen are not duplicated.
## Help Center: Set tags
URL: https://repsona.com/help/articles/003005000-admin-tag
Markdown: https://repsona.com/help/articles/003005000-admin-tag.md
Use tags in Repsona to classify tasks and add reactions. Anyone can create tags (for example, when creating tasks), but only administrators can delete them. This page explains how to manage tags.
| Who can use it | Available on |
|---|---|
| Owner, Admin | Standard plan |
## Set tags
1. Open the settings menu from the icon in the upper-right corner of the screen.
2. Click "Administrator Settings".
3. Open the "Tags" tab.
## Edit tags
Click the "Edit" link to the right of a tag name to open the edit popup. You can change the tag name and color.
## Delete a tag
Click the cross button to the right of a tag name to delete it. This action cannot be undone.
## Help Center: Set IP restrictions
URL: https://repsona.com/help/articles/003006000-admin-ip
Markdown: https://repsona.com/help/articles/003006000-admin-ip.md
In Repsona, you can restrict access to your space by IP address. This page explains how to configure IP restrictions.
| Who can use it | Available on |
|---|---|
| Owner | Standard plan |
## Set IP restrictions
1. Open the settings menu from the icon in the upper-right corner of the screen.
2. Click "Administrator Settings".
3. Open the "Allowed IPs" tab.
### Current IP address
This shows the IP address you’re currently connecting from. Add this address to Allowed IPs for space-level IP restrictions to take effect. Click "Add" to include it.
### Enable IP restrictions for the space
Turn on the "Enable IP restrictions for this space" switch and click "Save" to enable restrictions. Once enabled, only allowed IP addresses can access the space.
### Add an allowed IP address
Click "Add allowed IP address". Enter the IP address and a note (optional), then click "Save".
Connections from allowed IP addresses are permitted when restrictions are enabled.
### Disable IP restrictions for the space
Turn off the "Enable IP restrictions for this space" switch and click "Save" to disable restrictions. Access from all IP addresses will be allowed.
### Notes
- Even if IP restrictions are disabled and anyone can access the login page, users still need a valid account to log in. Each space has a unique login URL.
- With IP restrictions enabled, access from mobile networks may not work because mobile IP addresses are not fixed. Use a permitted fixed IP to connect.
## Help Center: Billing
URL: https://repsona.com/help/articles/003007000-admin-billing
Markdown: https://repsona.com/help/articles/003007000-admin-billing.md
To use a paid Repsona plan, set up a payment method and choose a plan. This page explains how to set a payment method and how to check your payment history.
| Who can use it | Available on |
|---|---|
| Owner | All |
## Billing
1. Open the settings menu from the icon in the upper-right corner of the screen.
2. Click "Administrator Settings".
3. Open the "Billing" tab.
### Current plan
Shows your current plan: Free or Standard.
If you're on the Free plan, the "Upgrade to Standard" button appears.
If you're on the Standard plan, the time and amount of your next payment are shown. You can change plans from the "Change plan" button.
### Payment method
Paid plans currently accept credit cards. Add the credit card you want to use for payment.
### Change credit card
Enter your new card information and click the "Add card" button. The card is added to the list. Click "Use this card" for the new card.
### Company name and address
Set your company name and address information. This information appears on invoices.
### Payment history
View your payment history. You can download invoices and receipts from the invoice number link. Only the most recent 24 months are displayed.
### Switch to Free plan
If you have an active paid plan, you'll see a "Switch to Free plan" button. Your current plan remains active until it expires; when the billing period ends, you'll move to the Free plan.
Because the Free plan allows only one project, select which project to keep when switching.
## Help Center: Change plan
URL: https://repsona.com/help/articles/003007010-admin-plan
Markdown: https://repsona.com/help/articles/003007010-admin-plan.md
Repsona has a Free plan and a paid Standard plan. To change plans, first set up a payment method. This page explains how to change your plan.
| Who can use it | Available on |
|---|---|
| Owner | All |
## Change plan
1. Open the settings menu from the icon in the upper-right corner of the screen.
2. Click "Upgrade".
or
1. Open the settings menu from the icon in the upper-right corner of the screen.
2. Click "Administrator Settings".
3. Open the "Billing" tab.
### Upgrade to the Standard plan
1. Click "Upgrade to Standard plan".
2. Enter the company name, address, and payment method.
3. Choose monthly or annual billing.
4. Click "Order now".
### Change monthly or annual billing
1. Click "Change plan" for your current plan.
2. Switch between monthly and annual billing.
3. The prorated charge is displayed.
4. Click "Change plan".
### Switch to Free plan
If you have an active paid plan, you'll see a "Switch to Free plan" button. Your current plan remains active until it expires; when the billing period ends, you'll move to the Free plan.
Because the Free plan allows only one project, select which project to keep when switching.
### Unsubscribe
You can delete a space by going to [Manage space settings](/help/articles/003001000-admin-space) and selecting "Delete your space".
## Help Center: Authentication settings
URL: https://repsona.com/help/articles/003007020-admin-auth
Markdown: https://repsona.com/help/articles/003007020-admin-auth.md
Configure account authentication for your Repsona space.
| Who can use it | Available on |
|---|---|
| Owner | All |
## Two-factor authentication
You can require two-factor authentication for all members when they log in. If someone hasn’t set up an authenticator app, email-based two-factor authentication will be used.
1. Open the settings menu from the icon in the upper-right corner of the screen.
2. Click "Administrator Settings".
3. Click "Authentication".
4. Turn on "Require two-factor authentication".
## Help Center: Delete a space (delete your account)
URL: https://repsona.com/help/articles/003007900-admin-delete-space
Markdown: https://repsona.com/help/articles/003007900-admin-delete-space.md
This page explains how to delete a Repsona space and your Repsona account.
| Who can use it | Available on |
|---|---|
| Owner | Free plan |
*If you are not on the Free plan, downgrade to the Free plan before deleting your account. Otherwise, billing will continue after deletion.*
## Delete a space (delete your account)
You can delete your space. Once deleted, this action cannot be undone. You will lose access to all data within the space. If you have an active paid plan, you cannot delete the space.
1. Open the settings menu from the icon in the upper-right corner of the screen.
2. Click "Administrator Settings".
3. Open the "Space profile" tab.
4. Click "Delete your space".
5. Click the "Delete your space" button.
## Help Center: Set your user profile
URL: https://repsona.com/help/articles/003008000-user-profile
Markdown: https://repsona.com/help/articles/003008000-user-profile.md
Set up your profile and self-introduction in Repsona to make projects smoother and more enjoyable. This page explains user profile settings.
| Who can use it | Available on |
|---|---|
| All | All |
## Set your user profile
1. Open the settings menu from the icon in the upper-right corner of the screen.
2. Click "User settings".
3. Open the "User profile" tab.
### Full name
Enter your "Full name" and click "Save". Your full name is used to display your user information across Repsona. Full-width Japanese is also supported.
### Username
Enter a "Username" and click "Save". Use 3–15 characters: half-width letters/numbers, dot ".", hyphen "-", and underscore "_". Your username is used for mentions in comments.
### About me
Enter your self-introduction and click "Save". It appears on your profile screen.
Here are some ideas:
- Your role in the company, projects you’re in, and your responsibilities
- Your strengths, qualifications, and skills
- About you, your family, and what you like
- What makes you happy, sad, or frustrated
- What you’re unsure about or want help with
### Profile photo
Click "Change photo" and upload an image. You can also drag and drop. Adjust the size and position, then click "OK".
Your profile photo appears throughout Repsona. With a photo, teammates recognize you at a glance. It also makes communication easier.
### Background image
Click "Change your background" and upload an image. You can also drag and drop. Adjust the size and position, then click "OK".
The background image appears on the home screen and your profile screen. Choose an image that expresses you and your style.
### Colors
Click the color selection button at the lower left of your profile image to show the color palette. Pick a color you like. This color is used across Repsona, including Gantt chart bars.
## Help Center: Set your email address
URL: https://repsona.com/help/articles/003009000-user-email
Markdown: https://repsona.com/help/articles/003009000-user-email.md
This article explains email address settings for Repsona users (your account).
| Who can use it | Available on |
|---|---|
| All | All |
## Set your email address
1. Open the settings menu from the icon in the upper-right corner of the screen.
2. Click "User Settings".
3. Open the Email tab.
### Current email
Your current email address is displayed. If "Verified!" is displayed, your address has been verified. Notifications will not be sent to unverified email addresses.
### Verify email
1. Click the "Verify Email" button.
2. You will receive an email with the subject "Confirm Email Address".
3. Click the "Confirm Email Address" button in the email. If the message "Verification succeeded!" is displayed, verification was successful.
### Change your email address
1. Enter your "New Email" and "Current password", then click the "Change Email Address" button.
2. You will receive an email with the subject "Change Email Address".
3. Click the "Confirm Email Address" button in the email. If the message "Verification succeeded!" is displayed, the change was successful.
*Your email address doesn’t change until verification succeeds.*
## Help Center: Set a password
URL: https://repsona.com/help/articles/003010000-user-password
Markdown: https://repsona.com/help/articles/003010000-user-password.md
This page explains password settings for your Repsona account.
| Who can use it | Available on |
|---|---|
| All | All |
## Set a password
1. Open the settings menu from the icon in the upper-right corner of the screen.
2. Click "User settings".
3. Open the Password tab.
### Change your password
Enter your "Current password" and "New password", then click "Save".
### Reset your password
1. Click the "Reset" button.
2. You’ll receive an email with the subject "Reset your password".
3. Click the "Choose a New Password" button in the email.
4. Enter your "New password" and click "Continue" to complete the reset.
## Help Center: Set language and time zone
URL: https://repsona.com/help/articles/003011000-user-language-timezone
Markdown: https://repsona.com/help/articles/003011000-user-language-timezone.md
This page explains language and time zone settings for your Repsona account.
| Who can use it | Available on |
|---|---|
| All | All |
## Set language and time zone
1. Open the settings menu from the icon in the upper-right corner of the screen.
2. Click "User settings".
3. Open the "Time zone & language" tab.
### Time zone
Select your time zone from the "Time zone" dropdown and click "Save". This affects how notification times and schedules are displayed.
### Language
Select a language from the "Language" dropdown and click "Save". This sets the language used across Repsona.
### Date format
Select a date format from the "Date format" dropdown and click "Save changes". You can choose month/day or day/month.
### First day of the week
Select a day from the "First day of the week" dropdown and click "Save changes". This sets the calendar’s starting day.
## Help Center: Set up notifications
URL: https://repsona.com/help/articles/003012000-user-notification
Markdown: https://repsona.com/help/articles/003012000-user-notification.md
This page explains notification settings for your Repsona account.
| Who can use it | Available on |
|---|---|
| All | All |
## Set up notifications
1. Open the settings menu from the icon in the upper-right corner of the screen.
2. Click "User settings".
3. Open the "Notifications" tab.
### Notifications
Choose one of: "All", "Mentions and involvement", or "None". Notifications are sent when a task is commented on or its status changes. "Mentions and involvement" is recommended.
### Delivery
Choose whether to receive email, browser, and mobile notifications. You can also choose whether to be notified of your own actions.
### News
#### Product updates
Receive occasional emails about Repsona updates.
#### Task reminders
Receive a daily task reminder from Repsona each morning. It lists approaching due dates by priority for tasks you’re responsible for and tasks where you hold the ball.
## Help Center: Set the display mode (dark mode, light mode)
URL: https://repsona.com/help/articles/003013000-user-darkmode
Markdown: https://repsona.com/help/articles/003013000-user-darkmode.md
This page explains display mode settings (dark mode, light mode) for your Repsona account.
| Who can use it | Available on |
|---|---|
| All | All |
## Set to dark mode
1. Open the settings menu from the icon in the upper-right corner of the screen.
2. Click "Appearance".
3. Click "Dark".
4. Click "Save".
## Set to light mode
1. Open the settings menu from the icon in the upper-right corner of the screen.
2. Click "Appearance".
3. Click "Light".
4. Click "Save".
*By default, Repsona follows your system settings.*
## Help Center: Two-factor authentication (2FA)
URL: https://repsona.com/help/articles/003014000-2fa
Markdown: https://repsona.com/help/articles/003014000-2fa.md
Repsona supports two-factor authentication (2FA) using authenticator apps. Enable two-factor authentication to add an extra layer of security to your Repsona account. When 2FA is enabled, you’ll verify your identity each time you log in.
| Who can use it | Available on |
|---|---|
| All | All |
## What are authenticator apps?
Authenticator apps are time-based one-time password (TOTP) apps such as Google Authenticator, Authy, Duo Mobile, or 1Password.
## Set up two-factor authentication (2FA)
1. Open the settings menu from the icon in the upper-right corner of the screen.
2. Click "Authentication".
3. A QR code appears. Scan it with your authenticator app.
4. The app displays a verification code. Enter the code.
5. Click "Enable".
6. Backup codes are displayed. Store them in a safe place.
## Disable two-factor authentication (2FA)
1. Open the settings menu from the icon in the upper-right corner of the screen.
2. Click "Authentication".
3. Click "Disable 2FA".
## Help Center: Set project information
URL: https://repsona.com/help/articles/003014000-project-profile
Markdown: https://repsona.com/help/articles/003014000-project-profile.md
Repsona manages tasks on a project basis. Clarify the project’s name and purpose so everyone shares the same understanding. This page explains project settings.
| Who can use it | Available on |
|---|---|
| Owner, Admin | All |
## Set project information
1. Click "Settings" on the right side of the project menu.
2. Open the "Project profile" tab.
### Set the full name (official name)
Enter the "Full name (official name)" and click "Save". Choose a name that people can understand at a glance.
What is this team doing? What is this project about? Give the project a clear name such as "XX Development Project", "Team XX Task Management", or "XX Production Committee".
### Set the project name
Enter the "Project name" and click "Save". Use 3–30 characters: half-width letters/numbers, dot ".", hyphen "-", and underscore "_". This is used inside the system.
### Set the purpose of the project
Enter the "Project purpose" and click "Save". It appears on the project home. State the "important reason why we are here" so new members immediately understand the purpose and current members stay motivated.
### Set a project profile image
Click "Change photo" and upload an image. You can also drag and drop. Adjust the size and position, then click "OK".
The project profile image appears throughout Repsona.
### Set the background image
Click "Change your background" and upload an image. You can also drag and drop. Adjust the size and position, then click "OK".
The background image is used on each project page. Choose something that conveys your project’s mood so you can enjoy using Repsona.
### Duplicate the project
*Available on the Standard plan only*
1. Click the "Duplicate" button for the project you want to copy.
2. Set the project’s full name and project name. If the name is already in use, choose a different name.
3. Set the project start date.
4. Set the initial members.
5. Click "Duplicate".
### Close the project
Click "Close" to close (complete) the project. Closed projects are excluded from the "Please select a project" list.
### Reopen the project
To reopen a closed project, turn on the "Show closed" switch at the top of the screen and click the "Re-open" button for the project.
## Help Center: Set the project’s product concept image
URL: https://repsona.com/help/articles/003015000-project-product-image
Markdown: https://repsona.com/help/articles/003015000-project-product-image.md
This page explains how to set the project’s product concept image in Repsona.
After you set the product concept image, it appears on the project home screen. Choose an image that lets project members and newcomers grasp the project’s overview and purpose at a glance.
| Who can use it | Available on |
|---|---|
| Owner, Admin | All |
## Set the product concept image
1. Click "Settings" on the right side of the project menu.
2. Open the "Product concept" tab.
3. Click "Change the product concept image".
4. Upload the image. You can also drag and drop. Adjust the size and position, then click "OK".
## Help Center: Set project members
URL: https://repsona.com/help/articles/003016000-project-member
Markdown: https://repsona.com/help/articles/003016000-project-member.md
This page explains member settings for a Repsona project.
| Who can use it | Available on |
|---|---|
| Owner, Admin | All |
## Set project members
1. Click "Settings" on the right side of the project menu.
2. Open the "Members" tab.
### Add or remove members
From the "Add member" dropdown under the project name, select and add a member. To remove a member, click the cross button at the upper right of their name.
## Help Center: Set project holidays
URL: https://repsona.com/help/articles/003016500-project-holiday
Markdown: https://repsona.com/help/articles/003016500-project-holiday.md
This page explains how to set holidays for Repsona projects.
| Who can use it | Available on |
|---|---|
| Owner, Admin | All |
## Set project holidays
1. Click "Settings" on the right side of the project menu.
2. Open the "Holiday settings" tab.
### Set regular days off and holidays
### Regular days off
Set the days of the week that are days off every week.
### Holidays
Set periods other than weekly days off when the entire project is closed, such as national holidays or special scheduled breaks.
### What happens when I set holidays?
If nothing is set, Saturday and Sunday are treated as days off. When you set specific holidays or weekends, the corresponding periods in Repsona’s calendar and Gantt chart are grayed out, and reminder emails are not sent.
## Help Center: Slack integration
URL: https://repsona.com/help/articles/003017000-project-slack
Markdown: https://repsona.com/help/articles/003017000-project-slack.md
This article explains Slack integration for Repsona projects. With Slack integration, you can receive real-time notifications for activity and updates.
| Who can use it | Available on |
|---|---|
| Owner, Admin | All |
## Set up Slack integration
1. Click "Settings" on the right side of the project menu.
2. Open the "Slack integration" tab.
3. Click "Add Slack integration".
4. When the Slack permission screen appears, select the workspace and channel.
Update a task or note to confirm Slack notifications are working.
## Choose which events to notify
Select which events to send to Slack. Uncheck any events you don’t need and save.
### About Slack notifications
If a Slack account uses the same email address as a user in Repsona, they’ll be mentioned in Slack as well. All selected events will trigger notifications. We recommend setting the linked Slack channel’s notifications to "Mentions only".
## Delete the Slack integration
Click the "Del" button in the list on the "Slack integration" screen.
## Help Center: Make the project public
URL: https://repsona.com/help/articles/003018000-project-public
Markdown: https://repsona.com/help/articles/003018000-project-public.md
This page explains public settings for Repsona projects. You can publish a project on the internet.
| Who can use it | Available on |
|---|---|
| Owner, Admin | All |
Making a project public allows users who are not logged in to view the task list on the status board. The names and icons of project members are also visible. Only logged-in users can download attachments and post comments.
## Make the project public
1. Click "Settings" on the right side of the project menu.
2. Open the "Change visibility" tab.
3. Turn on "Make the project public on the internet".
4. Click "Save".
## Make the project private
1. Turn off "Make the project public on the internet".
2. Click "Save".
## Help Center: System requirements for using Repsona
URL: https://repsona.com/help/articles/004001000-requirements
Markdown: https://repsona.com/help/articles/004001000-requirements.md
For details on the technical requirements needed to run Repsona, please refer to the supported operating systems (OS) and browsers below.
## Desktop
| OS | Requirements | Status |
|---------|---------------------------|-----------|
| macOS | macOS 12 or later | Supported |
| Windows | Windows 11 21H2 or later | Supported |
## Mobile
| OS | Requirements | Status |
|---------|---------------------|---------------------|
| iOS | iOS 17 or later | Supported (via app) |
| Android | Android 11 or later | Supported (via app) |
## Web browsers
For the web app, use one of the supported browsers below.
| Browser | Requirements | Status |
|----------------|----------------------|-----------|
| Chrome | Version 130 or later | Supported |
| Firefox | Version 131 or later | Supported |
| Safari | Version 18 or later | Supported |
| Microsoft Edge | Version 129 or later | Supported |
## Unsupported browsers and operating systems
To ensure a smooth experience, Repsona supports only the browsers and OS versions listed above. Bug fixes and other support are provided only for supported environments, so please use one of the recommended browsers.
## Help Center: Repsona glossary
URL: https://repsona.com/help/articles/004001000-words
Markdown: https://repsona.com/help/articles/004001000-words.md
This glossary is a list of terms and definitions used in the Repsona service.
## Glossary
Coming soon…
## Help Center: Frequently asked questions
URL: https://repsona.com/help/articles/004002000-faq
Markdown: https://repsona.com/help/articles/004002000-faq.md
FAQ
## Pricing and payment
### Can I upgrade only myself, not all members in my space?
Sorry, upgrades apply to the entire space. Repsona is designed to help teams collaborate smoothly, and our paid plans follow that purpose. To use the advanced features, please upgrade your space.
### What payment methods are accepted?
Currently, we accept credit cards only.
### How can I use Repsona credit points?
If you have Repsona credit points, they will be applied first. Your credit card will not be charged until your points are used up. Your points will not expire as long as you sign a contract before their stated expiration date.
### I want to invite a new member to the space. How will you charge for the new member?
The fee for the new member is prorated based on the days remaining in the current billing period and will be charged to your credit card in addition to your regular payments.
For example, if a new member is added on the 10th day of the billing period and there are 20 days left until the next billing period, under the following conditions:
- Your contract: Standard plan
- Fee per member: $8.00 per month per active user
The daily fee for the new member is "$8.00 divided by 30 days", and the total cost will be $5.33 (20 days × daily fee). This will be charged to the registered credit card for the space where the member was added.
### I want to use the Free plan. How can I cancel? Can I receive a refund?
Only a space owner can change the contract. If the owner downgrades from a paid plan to the Free plan, it will automatically switch on the next renewal date. Your contract remains valid until the end of the current paid period. We do not provide refunds for fees already paid.
### What is the activity log and its retention period?
The activity log records messages such as "A new task was created" or "Commented on your task". The retention policy applies only to activity messages. Tasks and notes are not deleted when the activity log reaches its retention limit.
## Help Center: Roles and permissions in Repsona
URL: https://repsona.com/help/articles/004003000-roles
Markdown: https://repsona.com/help/articles/004003000-roles.md
There are a few roles for Repsona accounts. For example, members do not have permission to create new projects. Please assign a suitable role to each account.
## Administrator settings
| | Owner | Admin | Member |
|---|:---:|:---:|:---:|
| Update space information | ✔︎ | ✔︎ | |
| Invite members | ✔︎ | ✔︎ | |
| Create invitation links | ✔︎ | ✔︎ | |
| Manage tags | ✔︎ | ✔︎ | |
| Configure IP restrictions | ✔︎ | | |
| Billing | ✔︎ | | |
## Project
| | Owner | Admin | Member |
|---|:---:|:---:|:---:|
| Create projects | ✔︎ | ✔︎ | |
| Assign members to projects | ✔︎ | ✔︎ | |
| Update projects | ✔︎ | ✔︎ | |
| Close projects | ✔︎ | ✔︎ | |
## Tasks (task tickets)
| | Owner | Admin | Member |
|---|:---:|:---:|:---:|
| Create tasks | ✔︎ | ✔︎ | ✔︎ |
| Update tasks | ✔︎ | ✔︎ | ✔︎ |
| Delete tasks | ✔︎ | ✔︎ | |
## Status
| | Owner | Admin | Member |
|---|:---:|:---:|:---:|
| Add statuses | ✔︎ | ✔︎ | ✔ |
| Rename statuses | ✔︎ | ✔︎ | ✔ |
| Delete statuses | ✔︎ | ✔︎ | |
## Notes
| | Owner | Admin | Member |
|---|:---:|:---:|:---:|
| Add notes | ✔︎ | ✔︎ | ✔︎ |
| Edit notes | ✔︎ | ✔︎ | ✔︎ |
| Delete notes | ✔︎ | ✔︎ | |
## Milestones
| | Owner | Admin | Member |
|---|:---:|:---:|:---:|
| Add milestones | ✔︎ | ✔︎ | ✔︎ |
| Update milestones | ✔︎ | ✔︎ | ✔︎ |
| Delete milestones | ✔︎ | ✔︎ | |
## Teammates
| | Owner | Admin | Member |
|---|:---:|:---:|:---:|
| Add role explanations | ✔︎ | ✔︎ | ✔︎ |
| Create teams | ✔︎ | ✔︎ | ✔︎ |
| Update teams | ✔︎ | ✔︎ | ✔︎ |
| Delete teams | ✔︎ | ✔︎ | |
## Problems (KPT)
| | Owner | Admin | Member |
|---|:---:|:---:|:---:|
| Create problems | ✔︎ | ✔︎ | ✔︎ |
| Update problems | ✔︎ | ✔︎ | ✔︎ |
| Delete problems | ✔︎ | ✔︎ | |
## Help Center: Plans and features of Repsona
URL: https://repsona.com/help/articles/004004000-pricing
Markdown: https://repsona.com/help/articles/004004000-pricing.md
Repsona offers two plans. The Free plan is available forever. The Standard plan lets you create multiple projects and manage them across projects. See the comparison table below or contact us for details.
## Plans and features
| | Free | Standard |
|-------------------------------------|:------------------------------:|:---------------------------------------------------------------------------------------------:|
| Price | Free | $7.00 Per active user/month (annual) $8.00 / Per active user (monthly) |
| Members | Unlimited | Unlimited |
| Tasks | Unlimited | Unlimited |
| Notes | Unlimited | Unlimited |
| Projects | 1 | Unlimited |
| Attachments per task | 3 | Unlimited |
| Storage | 1 GB per space | 10 GB per member |
| Activity Log Retention | 1 month | 12 months |
| Notice Log Retention | 1 month | 12 months |
| API Rate limit | read:1000, write:150 /1m/space | read:2000, write:150 /1m/user |
| Cross-Project Task Management | | ✔ |
| Duplicating a project | | ✔ |
| IP address based access restriction | | ✔ |
| Technical Support | ✔ | Priority Support |
## FAQ
###### Can I upgrade only myself, not all members in my space?
Sorry, upgrades apply to the entire space. Repsona is designed to help teams collaborate smoothly, and our paid plans follow that purpose. To use advanced features, please upgrade your space.
###### What payment methods are accepted?
Currently, we accept credit cards only.
###### How can I use Repsona credit points?
If you have Repsona credit points, they will be applied first. Your credit card will not be charged until your points are used up. Your points will not expire as long as you sign a contract before their stated expiration date.
###### I want to invite a new member to the space. How will you charge for the new member?
The fee for the new member is prorated based on the days remaining in the current billing period and will be charged to your credit card in addition to your regular payments. For example, if a new member is added on the 10th day of the billing period and there are 20 days left until the next billing period, under the following conditions:
- Your contract: Standard plan
- Fee per member: $8.00 per month per active user
The daily fee for the new member is "$8.00 divided by 30 days", and the total cost will be $5.33 (20 days × daily fee). This will be charged to the registered credit card for the space where the member was added.
###### I want to use the Free plan. How can I cancel? Can I receive a refund?
Only a space owner can change the contract. If the owner downgrades from a paid plan to the Free plan, it will automatically switch on the next renewal date. Your contract remains valid until the end of the current paid period. We do not provide refunds for fees already paid.
###### What is the activity log and its retention period?
The activity log records messages such as "A new task was created" or "Commented on your task". The retention policy applies only to activity messages. Tasks and notes are not deleted when the activity log reaches its retention limit.
## Help Center: Download the Repsona mobile apps
URL: https://repsona.com/help/articles/004005000-app
Markdown: https://repsona.com/help/articles/004005000-app.md
Repsona mobile apps let you check project updates on the go and stay in sync with your team. Download the app to communicate and manage tasks efficiently wherever you are.
## Download the Repsona mobile apps
### iOS
1. Search for "Repsona" in the App Store.
1. Tap GET to download.
1. Tap OPEN to launch.
### Android
1. Search for "Repsona" in the Google Play Store app.
1. Tap INSTALL to download.
1. Tap the Repsona icon to launch.
## Help Center: About the Repsona WebSocket connection
URL: https://repsona.com/help/articles/004006000-connection
Markdown: https://repsona.com/help/articles/004006000-connection.md
If you’re having trouble connecting to Repsona—or pages and tasks aren’t updating—see this page.
## Check system requirements
Make sure you’re using a supported OS and browser, and the latest version of Repsona. If you’re using an unsupported or older browser, you may experience connectivity issues and some features may not work.
## Network settings
Repsona uses WebSockets over port 443 to maintain a persistent connection between the Repsona server and member apps and browsers.
Proxies and firewalls can block this connection. If necessary, adjust your settings to allow persistent connections to Repsona.
## Network environment
Antivirus software, ad‑blocking software, security tools, and firewalls can interfere with Repsona’s connection.
Temporarily disabling such software can help troubleshoot connectivity issues. If this resolves the issue, configure the software to allow Repsona.
If the connection issue persists, contact your organization’s network administrator. If you need further assistance, feel free to contact Repsona Support.
## Help Center: Migrate data from Gantt-san to Repsona
URL: https://repsona.com/help/articles/004007000-gantt-san-json
Markdown: https://repsona.com/help/articles/004007000-gantt-san-json.md
This guide explains how to migrate data from Gantt-san to Repsona.
## What is Gantt-san?
[Free Gantt Chart — No Sign-up, No Login](https://repsona.com/lp/free-gantt) is an online Gantt chart service that you can use completely free—no account registration, login, or download required.
## Export JSON from Gantt-san
You can export Gantt-san charts in JSON format. Click the "Export" button at the top of the Gantt-san screen to download the file.
## Before importing
Repsona manages data in a different format from Gantt-san. Set up statuses and members in Repsona in advance.
### Create statuses
Create in Repsona the statuses you want to import, using the same names as in Gantt-san.
[Set status names and order](/help/articles/002008000-status)
### Invite members
Invite or create members in Repsona beforehand, using the same names as in Gantt-san. You can also register by name only (create a no-login member).
[Invite your teammates to Repsona](/help/articles/001004000-invite)
## Import Gantt-san JSON into Repsona
Select the project in Repsona where you want to import the data. Open the project’s "Task list" submenu.
*↑ submenu button*
Select "Import from Gantt-san JSON" and upload the JSON file to import the data.
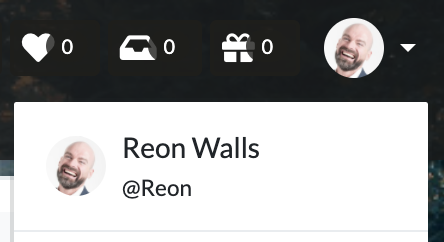 2. Click "User settings".
3. Enter your name and upload an image, then click "Save".
With a profile photo, your teammates will recognize you at a glance. It also makes communication easier.
## Set up a project
By default, a project named "Project 1" is available.
If you already know your project’s name and details, set them now.
1. Select "Project 1" from the project selector in the upper-left corner of the screen.
2. Click "Settings" on the far right of the project menu to open project settings.
3. Set the image, official name, project name, and purpose, then click "Save".
Your first project is now configured.
New to work management? Don’t worry. Start by creating a task and completing it.
## Help Center: Quick start guide (for beginners)
URL: https://repsona.com/help/articles/001003000-quick-start
Markdown: https://repsona.com/help/articles/001003000-quick-start.md
New to Repsona and work management? Repsona is easy to use. Here’s a simple guide to get started.
You might be surprised by the number of menus when you first open Repsona. Don’t worry! To begin with, you only need the "Task list".
Repsona is simple and easy to understand. Let’s start with the basics.
## How to work with Repsona
1. Create a task
2. Assign an assignee
3. Work on the task
4. When you’re done, set the status to "Done"
That’s it!
## Create a task
You can create a task from the Task list using the + button.
Enter a title to create a task. A good naming tip is to use the imperative form.
Write the details under the task name. Clarify what needs to be done to consider this task "finished".
Click the "Create" button to create the task.
## Assign an assignee
When you have a task, assign an "assignee"—the person responsible for the task.
If there’s a due date, set it. "Ball" indicates the person temporarily holding the task. You can leave it blank at first or set it to the same person as the assignee.
## Work on the task
The assignee should move the task forward. You may temporarily hand it off to someone else. In that case, set them as the "ball" and contact them.
You can contact them in the comments section at the bottom of the task screen. Mention their username in a comment and your teammate will be notified.
Communicate and move your tasks forward step by step.
## When you’re done, set it to "Done"
Finished the task? Review the details and, when complete, change the "Status" to "Done".
## Congratulations! Your first task is complete!
Even work that seems big and endless can be completed by breaking it down and setting due dates. For a large project where the goal isn’t yet clear, split it into smaller pieces and make a plan.
Don’t worry if breaking it down is difficult. Start with a rough, high-level to-do list and gradually split items into smaller tasks—it will grow into a detailed plan.
We hope your project is smooth and enjoyable!
Need a team for your next task? Invite your teammates.
## Help Center: Invite your teammates to Repsona
URL: https://repsona.com/help/articles/001004000-invite
Markdown: https://repsona.com/help/articles/001004000-invite.md
Invite your teammates to your Repsona space to move the project forward. Here’s how to invite them.
| Who can use it | Available on |
|---|---|
| Owner, Admin | All |
Repsona is great for managing your own tasks, and even better with your team. You can comment on tasks, manage statuses, and more. Invite your teammates to keep work moving.
## Two ways to invite
- Join via an "invitation link"
- Send an "invitation email"
## Join via an invitation link
1. Open the settings menu from the icon at the top right of the screen.
2. Click "User settings".
3. Enter your name and upload an image, then click "Save".
With a profile photo, your teammates will recognize you at a glance. It also makes communication easier.
## Set up a project
By default, a project named "Project 1" is available.
If you already know your project’s name and details, set them now.
1. Select "Project 1" from the project selector in the upper-left corner of the screen.
2. Click "Settings" on the far right of the project menu to open project settings.
3. Set the image, official name, project name, and purpose, then click "Save".
Your first project is now configured.
New to work management? Don’t worry. Start by creating a task and completing it.
## Help Center: Quick start guide (for beginners)
URL: https://repsona.com/help/articles/001003000-quick-start
Markdown: https://repsona.com/help/articles/001003000-quick-start.md
New to Repsona and work management? Repsona is easy to use. Here’s a simple guide to get started.
You might be surprised by the number of menus when you first open Repsona. Don’t worry! To begin with, you only need the "Task list".
Repsona is simple and easy to understand. Let’s start with the basics.
## How to work with Repsona
1. Create a task
2. Assign an assignee
3. Work on the task
4. When you’re done, set the status to "Done"
That’s it!
## Create a task
You can create a task from the Task list using the + button.
Enter a title to create a task. A good naming tip is to use the imperative form.
Write the details under the task name. Clarify what needs to be done to consider this task "finished".
Click the "Create" button to create the task.
## Assign an assignee
When you have a task, assign an "assignee"—the person responsible for the task.
If there’s a due date, set it. "Ball" indicates the person temporarily holding the task. You can leave it blank at first or set it to the same person as the assignee.
## Work on the task
The assignee should move the task forward. You may temporarily hand it off to someone else. In that case, set them as the "ball" and contact them.
You can contact them in the comments section at the bottom of the task screen. Mention their username in a comment and your teammate will be notified.
Communicate and move your tasks forward step by step.
## When you’re done, set it to "Done"
Finished the task? Review the details and, when complete, change the "Status" to "Done".
## Congratulations! Your first task is complete!
Even work that seems big and endless can be completed by breaking it down and setting due dates. For a large project where the goal isn’t yet clear, split it into smaller pieces and make a plan.
Don’t worry if breaking it down is difficult. Start with a rough, high-level to-do list and gradually split items into smaller tasks—it will grow into a detailed plan.
We hope your project is smooth and enjoyable!
Need a team for your next task? Invite your teammates.
## Help Center: Invite your teammates to Repsona
URL: https://repsona.com/help/articles/001004000-invite
Markdown: https://repsona.com/help/articles/001004000-invite.md
Invite your teammates to your Repsona space to move the project forward. Here’s how to invite them.
| Who can use it | Available on |
|---|---|
| Owner, Admin | All |
Repsona is great for managing your own tasks, and even better with your team. You can comment on tasks, manage statuses, and more. Invite your teammates to keep work moving.
## Two ways to invite
- Join via an "invitation link"
- Send an "invitation email"
## Join via an invitation link
1. Open the settings menu from the icon at the top right of the screen.